VeraCrypt for Windows - Secure File Storage
Este guia está desatualizado
Índice
...Carregando Tabela de Conteúdos...VeraCrypt encrypts your data and prevents anyone who does not have your passphrase from accessing them. It works like an electronic safe in which you can securely store your files.
Required reading
What you will get from this guide
- The ability to protect your files if your computer or USB storage device gets lost, stolen or confiscated
- The ability to access and modify the same set of sensitive files on Windows, Mac OS X and Linux computers
- A secure way to backup important files
1. Introduction to VeraCrypt
VeraCrypt is free software that allows you to encrypt your files. It is an updated version of the unmaintained TrueCrypt project and is available for Microsoft Windows, Mac OS X and GNU/Linux. It addresses various security vulnerabilities that have since been identified in TrueCrypt.
1.0. Things you should know about VeraCrypt before you start
VeraCrypt will protect your files by encrypting them with a passphrase. It creates a protected area, called a volume, on your computer or external storage device. This entire volume lives inside a single file called a container, which you can open (or mount) and close (or dismount) using VeraCrypt. You can safely store your files inside this container.
VeraCrypt can also create and manage encrypted volumes that occupy all of the space on a particular storage device. However, this guide focuses on the use of containers.
VeraCrypt uses on-the-fly encryption to protect your data. On-the-fly encryption transparently encrypts files as they are being written to a volume and transparently decrypts them as they are being read. You can copy files to and from a VeraCrypt volume in the same way that you would copy them to and from a normal folder or USB storage device.
VeraCrypt supports both standard encrypted volumes and hidden volumes. Either one will keep your files confidential, but hidden volumes allow you to hide your important information behind less sensitive data in order to protect it even if you are forced to reveal your VeraCrypt passphrase. This guide covers the creation and use of both standard volumes and hidden volumes.
Remember, if you forget your passphrase, you will lose access to your data! There is no way to recover a lost passphrase. Also, keep in mind that the use of encryption is illegal in some jurisdictions.
For more information about VeraCrypt, see:
- The official documentation
- The official FAQ
1.1 Other tools like VeraCrypt
Full-featured editions of Windows since Windows 7 contain the BitLocker full-disk encryption utility. (This includes Windows 7 Ultimate, Windows 7 Enterprise, Windows 8 Pro, Windows 8 Enterprise and Windows 10 Pro).
For Mac OS X you can use the built-in FileVault utility for full-disk encryption (or to encrypt just your home directory). Mac OS X also has a Disk Utility that can create encrypted volumes on USB storage devices, but you will only be able to access these volumes on a Mac.
Both FileVault (for Mac OS X) and BitLocker (for Windows) are proprietary software. As a result, the security they provide can not be independently verified. Nonetheless, it is a good idea to enable them if possible. You can use VeraCrypt, in addition to these built-in tools, to protect your most sensitive files and to move them between Linux, Mac OS X and Windows computers.
Many GNU Linux distributions, including Ubuntu, support full-disk encryption as a standard feature. We recommend enabling full-disk encryption when you install Linux, as it is far easier than doing so later. In addition, you can use the built in Disk Utility on most Linux distributions to create an encrypted volume on a USB storage device. Unlike VeraCrypt, however, this will only allow you to access your files on other Linux computers. You can use VeraCrypt to move files between Linux, Mac OS X and Windows.
2. Installing VeraCrypt
To install VeraCrypt on your computer, follow the steps below:
Step 1. Double click on the installer file named "VeraCrypt Setup 1.16.exe".
Figure 1: The VeraCrypt installer
VeraCrypt will ask you if you want to allow the installer to make changes to your PC, as shown below.

Figure 2: The VeraCrypt User Access Control screen
Step 2. Click [Yes] to run the VeraCrypt Setup program, which will activate the license screen

Figure 3: The VeraCrypt license
Step 3. Check the box labelled I accept the license terms to enable the [Next] button, then click [Next]. You may then choose whether you want to install VeraCrypt or extract it for use in portable mode
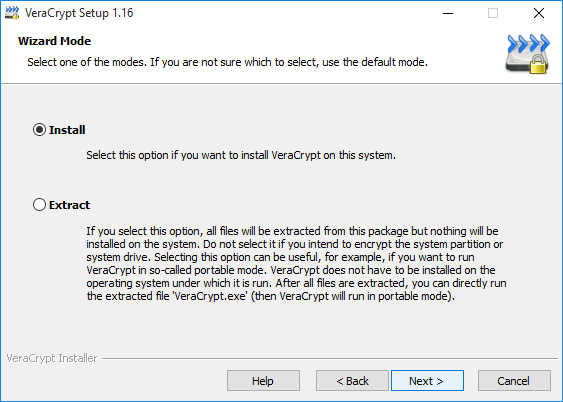
Figure 4: The installation wizard showing the default Installation mode
- Install mode: This option is for users who have no need to hide the fact that VeraCrypt is installed on their computer and who are willing to install it on any other computers where they need access to VeraCrypt.
- Extract mode: This option is for users who wish to carry a portable version of VeraCrypt on a USB storage device rather than installing it on a computer. The portable version can be run on any Windows computer where the user has an Administrator account.
IMPORTANT: Even in portable mode, VeraCrypt leaves traces on computers where it is used. These traces will not reveal the contents of encrypted files, but they may reveal the fact that VeraCrypt was used on that computer.
Note: This section of the guide covers installing VeraCrypt on your computer. To learn more about using VeraCrypt in portable mode, please refer to the Portable VeraCrypt section.
Step 4. Click [Next] and choose where to install VeraCrypt.
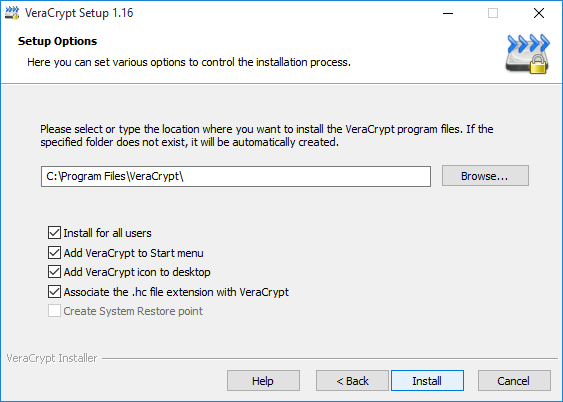
Figure 5: The Setup Options window
Step 5. Click [Install] to begin installing VeraCrypt in the default location on your computer as shown below
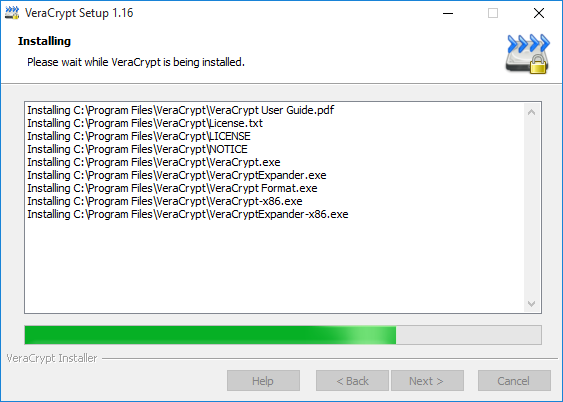
Figure 6: VeraCrypt installer progress
When it is finished, the installer will let you know
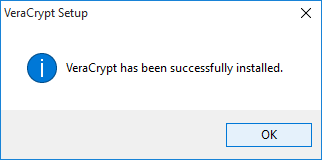
Figure 7: VeraCrypt installation successful
Step 6. Click [OK] to acknowledge the completion of the installation and consider making a donation to those who develop and maintain VeraCrypt.
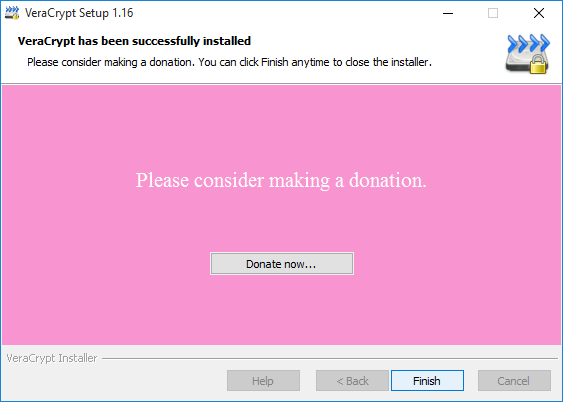
Figure 8: VeraCrypt donation prompt
Step 7 Click [Finish] and consider reading the VeraCrypt tutorial.
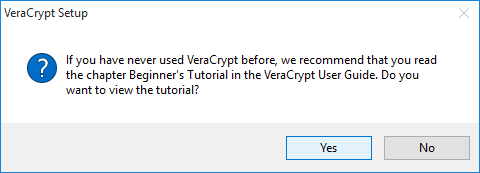
Figure 9: The VeraCrypt tutorial prompt
Step 8. Click either button to finish installing VeraCrypt. Depending on your installation preferences, you may now have a VeraCrypt shortcut on your desktop.
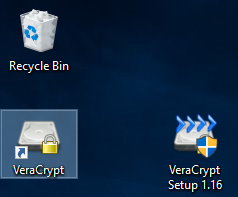
Figure 10: The VeraCrypt application shortcut
IMPORTANT: If you do not wish to announce the fact that you have encrypted files on your computer, you might want to delete this shortcut. And, if having encryption software on your computer could get you into serious trouble, you should remove VeraCrypt entirely, then extract it onto a USB storage device in portable mode.
Note: Users are encouraged to consult the VeraCrypt Beginner's Tutorial after working through this guide.
3. Creating a standard volume
VeraCrypt lets you create two kinds of encrypted volumes: Hidden volumes and Standard volumes.
- Standard volumes protect your files with a passphrase that must be entered in order to access them
- Hidden volumes have two passphrases. You can enter one of them to open a decoy standard volume in which you should store less sensitive files that you are willing to "give up" if necessary. Entering the other passphrase will open the hidden volume containing your truly sensitive files.
In this section, you will learn how to create a standard volume. If you want to create a Hidden volume, you should complete this section, then continue on to Creating a hidden volume.
To create a Standard volume with VeraCrypt, perform the following steps.
Step 1. Launch VeraCrypt ([Start] > [Programs] > [VeraCrypt] > [VeraCrypt]) to open the main application window.
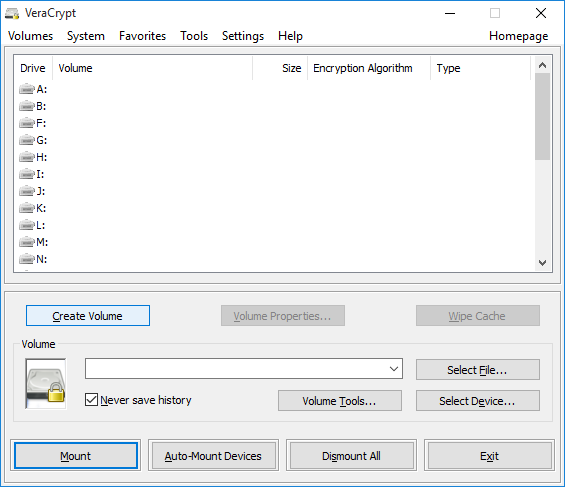
Figure 1: The main VeraCrypt window
Step 2. Click [Create Volume] to activate the VeraCrypt Volume Creation Wizard
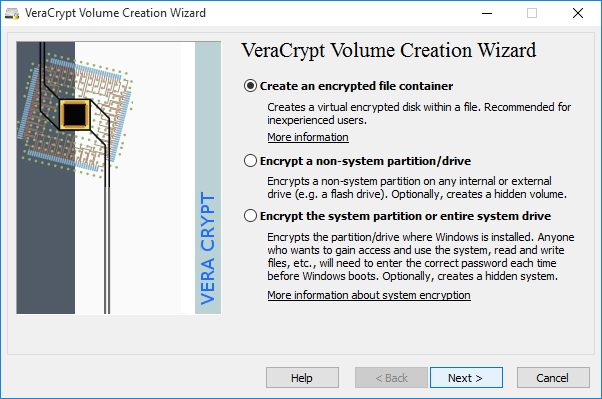
Figure 2: Volume Creation Wizard window
A VeraCrypt container file is an encrypted volume that is stored within a single file. This container can be renamed, moved, copied or deleted like any other file. In this section, we will create a container file. Please refer to the VeraCrypt documentation to learn more about the other options.
Step 3. Click [Next] to select which type of volume you would like to create.

Figure 3: The Volume Type window
The VeraCrypt Volume Creation Wizard Volume Type window lets you specify whether you want to create a Standard or Hidden volume.
Note: For more information about How to Create a Hidden Volume, please refer to the Hidden volumes section.
Step 4. Make sure that Standard VeraCrypt Volume is selected and click [Next] to choose a name and location for your VeraCrypt container file.
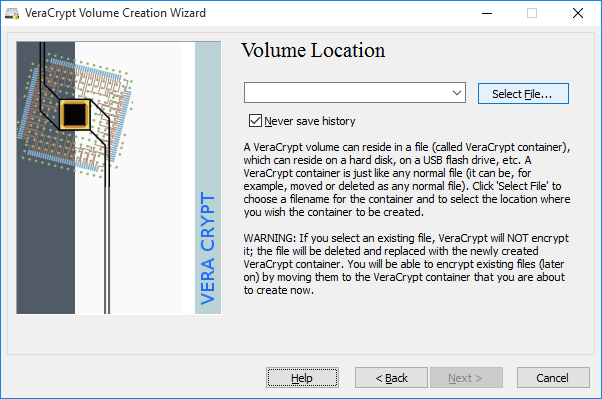
Figure 4: The Volume Creation Wizard - Volume Location input
Step 5. Click [Select File…] to choose a location.
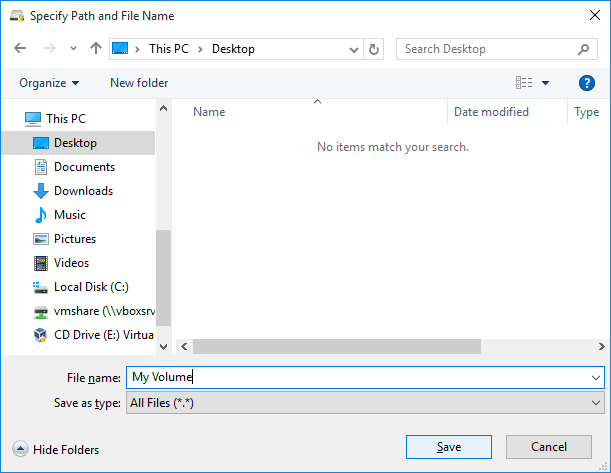
Figure 5: Specify the location and filename of the VeraCrypt container you are about to create
Step 6. Choose a location and specify a name for the VeraCrypt container file you are about to create.
You will need to remember where you put it and what you call it. In this section, we will create our container on the Desktop and name it My Volume. If you want to create a VeraCrypt standard volume on a USB storage device instead, simply navigate to the device (rather than to your Desktop), and enter a file name.
Tip: You can use any file name or file extension for your container. For example, you can name your container file recipes.doc, or holidays.mpg in hopes that a casual observer will think it is a Microsoft Word document or a video file. This is one way you can help disguise the existence of a VeraCrypt container, but it will not work against someone who has the time and resources to search your device thoroughly.
Step 7. Click [Save] to close the Specify Path and File Name window and return to the Volume Creation Wizard window.

Figure 6: Volume Creation Wizard displaying the Volume Location window
Step 8. Click [Next] to activate the Encryption Options screen
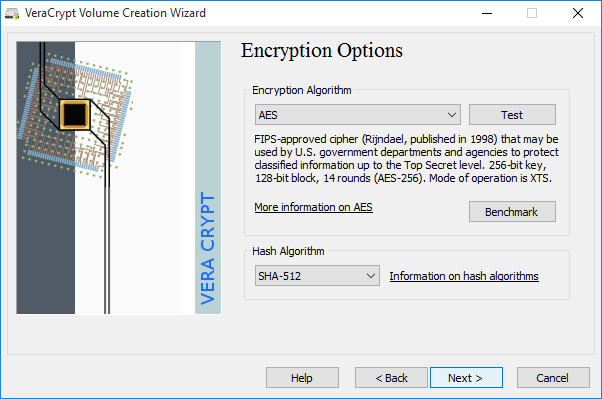
Figure 7: The Volume Creation Wizard Encryption Options window
Here, you can choose a specific method (or algorithm ) to use when encrypting and decrypting the files stored within your VeraCrypt container. The default options are considered secure, so you should probably leave them as they are.
Step 9. Click [Next] and determine how large to make your encrypted volume.
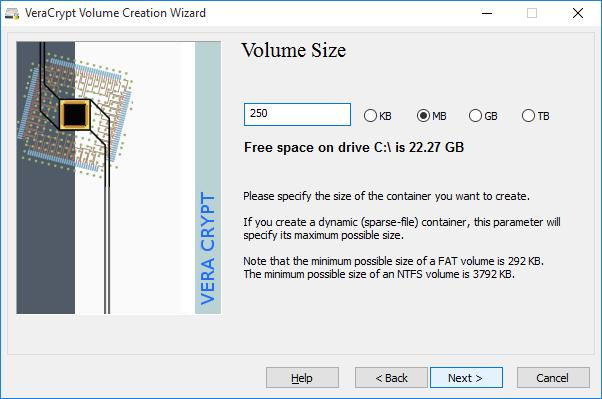
Figure 8: The Volume Creation Wizard displaying the Volume Size window
The Volume Size window lets you specify the size of the container you are about to create. In this section, we will create a 250 MB volume, but you might want to specify a different size. Consider the number of files — and, more importantly, the types of files — you intend to store in your encrypted volume. Image files and videos, in particular, can fill up a small VeraCrypt container very quickly.
Tip: If you intend to upload the container file to an online storage service, you will have to determine a reasonable size based on the speed of your Internet connection.
Step 10. Type the size of the volume you would like to create. Make sure you select the correct value for KB (kilobytes), MB (megabytes), GB (gigabytes) or TB (terabytes). Then click [Next] to choose a passphrase.
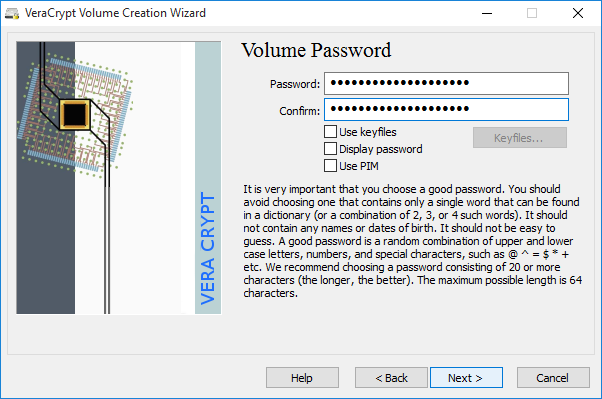
Figure 9: Volume Creation Wizard featuring the Volume Password window
IMPORTANT: Choosing a strong passphrase is one of the most important steps you will perform when creating a VeraCrypt volume. The stronger the passphrase, the better. You don't have to choose your own passphrases (or even remember them!) if you use a password manager like KeePassX. Please refer to the Create and maintain secure passwords and KeePassX guides to learn more about good passphrase practices.
Step 11. Type your passphrase and then re-type your passphrase into the Confirm field to activate the [Next] button.
IMPORTANT: The button labelled "Next" will remain disabled until the two passphrases you have entered match. If your passphrase is weak, you will see a warning. Consider changing it! Though VeraCrypt will accept any passphrase, your data will not be secure unless you choose a strong one.
Step 12. Click [Next] to select a file system type.
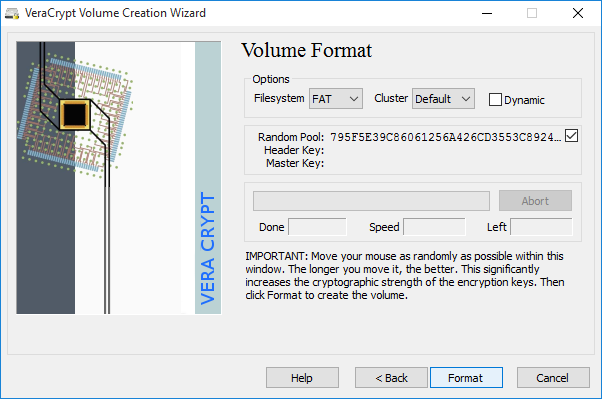
Figure 10: Volume Creation Wizard featuring the Volume Format window
Step 13. Click [Format] to begin creating your standard volume.
Note: The default value ("FAT") will work for most people and is compatible with Windows, Mac OS X and Linux computers. However, if you intend to store files that are larger than 4 GB (for a single file), then you will have to select a different file system type. NTFS will work on Windows computers and most Linux computers.
VeraCrypt is now ready to create a standard encrypted volume within a container file. If you move your mouse within the VeraCrypt Volume Creation Wizard window, it will produce random data that will help strengthen the encryption.
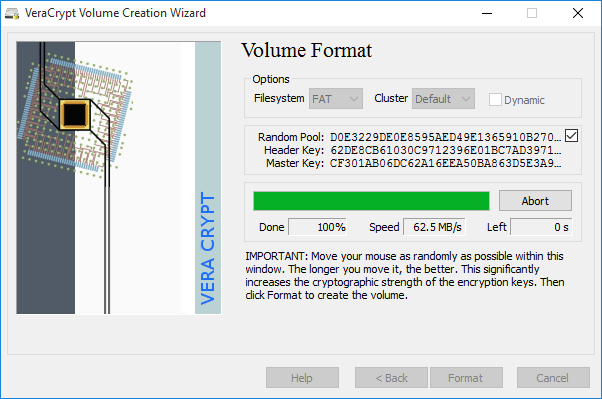
Figure 11: Volume Creation Wizard progress bar
VeraCrypt will now create a file named My Volume on the Desktop, as specified above. This file will contain a 250 MB VeraCrypt standard volume container, which you can use to store your files securely. VeraCrypt will let you know when it is done.
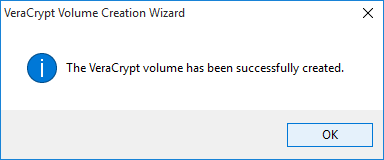
Figure 12: volume has been successfully created
Step 14. Click [OK] to acknowledge the completion of the creation process and return to the volume creation wizard.
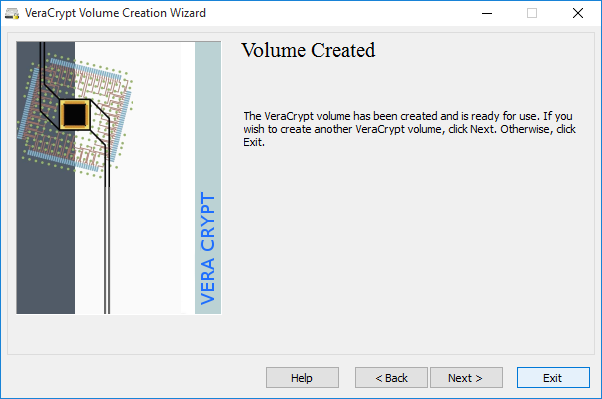
Figure 13: Exit or create another encrypted volume
Step 15. Click [Exit] to close VeraCrypt Volume Creation Wizard and return to the VeraCrypt's main window. (If you click [Next], VeraCrypt will begin walking you through the process of creating another encrypted volume.)
You should now see your 250 MB container file wherever you created it.
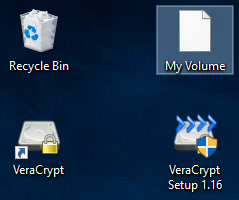
Figure 14: Newly-created VeraCrypt container file on the Desktop
4. Creating a hidden volume
In VeraCrypt, a hidden volume is stored within your encrypted standard volume, but its existence is concealed. Even when your standard volume is mounted, it is not possible to confirm the existence of a hidden volume without its passphrase (which is separate from that of the standard volume).
A hidden volume is a bit like a secret compartment in a locked briefcase. You store decoy files that you do not mind having confiscated in the briefcase while keeping your most sensitive files in the secret compartment. The point of a hidden volume is to hide its own existence, thereby hiding the files within it, even if you are forced to reveal the passphrase to your standard volume. For this technique to be effective, you must create a situation where the person demanding to see your files will be satisfied by what you show them. To do this, you may want to implement some of the following suggestions:
- Put some confidential documents that you do not mind having exposed in the standard volume. This information must be sensitive enough that it would make sense for you to keep it in an encrypted volume.
- Update the files in the standard volume on a regular basis. This will create the impression that you really are using those files.
- Be aware that someone demanding to see your files may know about the concept of hidden volumes. If you are using VeraCrypt correctly, this person will not be able to prove that your hidden volume exists, but they may suspect it.
As mentioned above, a hidden volume is technically stored inside a standard volume. This is why VeraCrypt sometimes refers to them as "inner" and "outer" volumes. Fortunately, you do not have to mount the latter to access the former. Instead, VeraCrypt allows you to create two separate passphrases: one that opens the outer or ("decoy") standard volume one that opens the inner hidden volume.
How to a Create a Hidden Volume
There are two different ways to create a hidden volume, and they are both very similar to the process of creating a standard volume.
Normal mode walks you through the process of creating both a standard volume and the hidden volume within it. (You are creating a briefcase with a secret compartment.)
Direct mode assumes that you already have a standard volume in which you want to create a hidden volume. (You already have the briefcase, but you want to add the secret compartment.)
In this section, we will focus on direct mode. If you do not yet have a standard volume, simply follow the steps outlined in Creating a standard volume, then return to this section.
Step 1. Launch VeraCrypt ([Start] > [All Apps] > [VeraCrypt] > [VeraCrypt]) to open the main application window.
Figure 1: The main VeraCrypt window
Step 2. Click [Create Volume] to activate the VeraCrypt Volume Creation Wizard.
Figure 2: The VeraCrypt Volume Creation screen
Step 3. Click [Next] to accept the default Create an encrypted file container option.
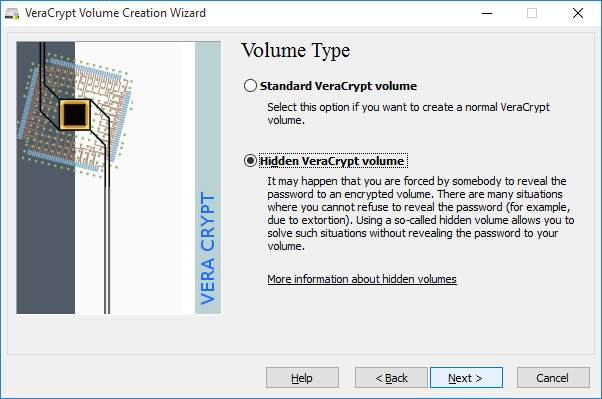
Figure 3: Creating a VeraCrypt hidden volume
Step 4. Check the [Hidden VeraCrypt volume] option.
Step 5. Click [Next] to choose whether you want to create your hidden volume using normal mode or direct mode.
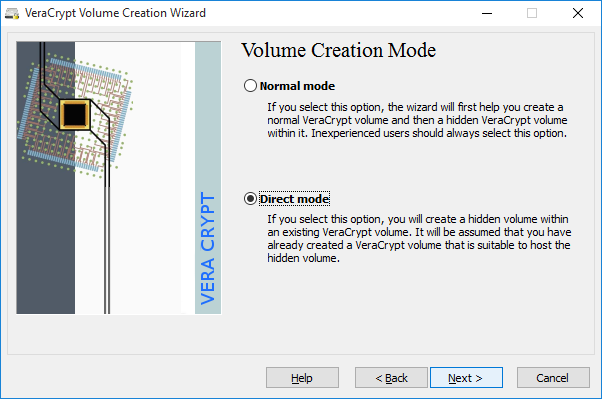
Figure 4: The VeraCrypt Volume Creation Wizard - Mode window
Step 6. Check the [Direct Mode] option.
Step 7. Click [Next] to select your existing standard volume.
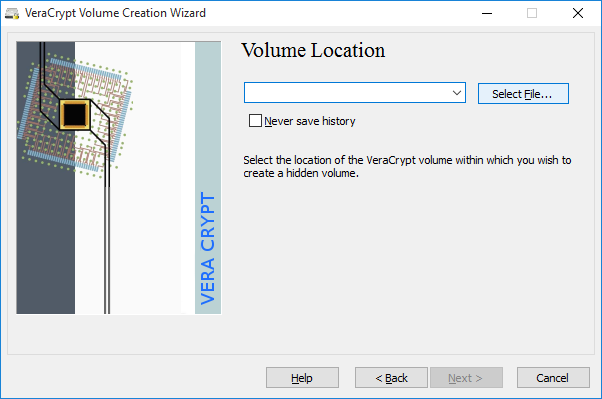
Figure 5: VeraCrypt's Volume Location screen
Note: Make sure your standard volume is unmounted before selecting it.
Step 8. Click [Select File] and locate your standard volume container file.
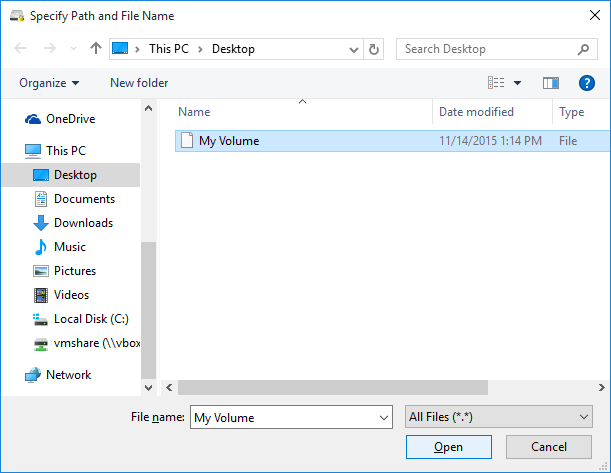
Figure 6: Selecting your existing VeraCrypt standard volume container file
Step 9. Locate the container file and select it.
If you want to create a VeraCrypt container on a USB storage device, simply navigate to the device (rather than to a folder on your computer) before choosing a file name.
Step 10. Click [Open] to return to the VeraCrypt Volume Creation Wizard.
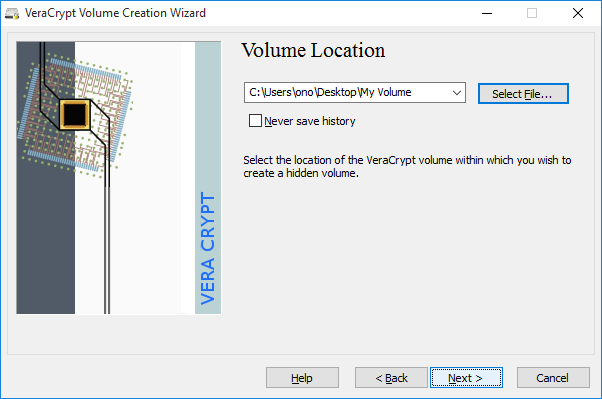
Figure 7: VeraCrypt standard volume container selected
Step 11. Click [Next] to enter the passphrase of your existing standard volume.
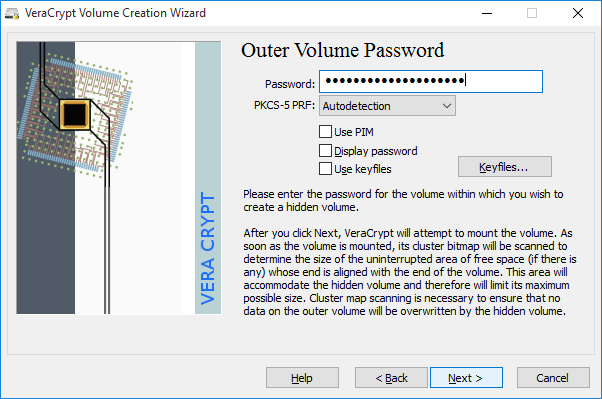
Figure 8: VeraCrypt Outer Volume Password screen
Step 12. Type in the passphrase you selected when creating the standard volume you have selected.
Step 13. Click [Next] to prepare this standard volume for the addition of a hidden volume
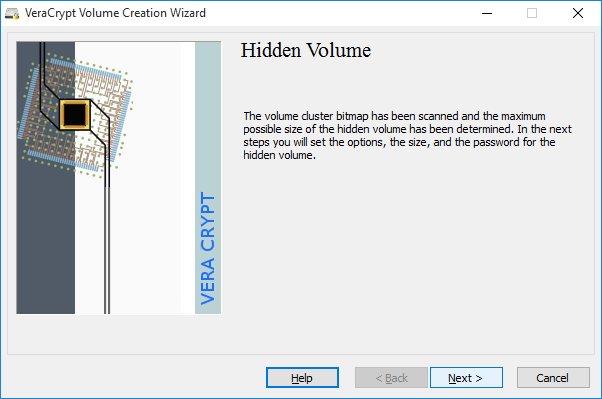
Figure 9: VeraCrypt standard volume prepared
Step 14. Click [Next] to select Hidden Volume Encryption Options.
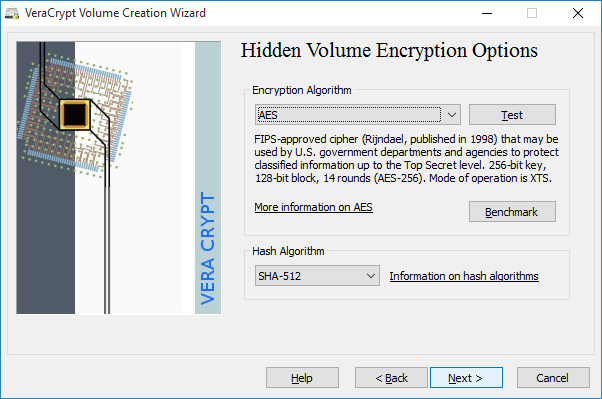
Figure 10: VeraCrypt Hidden Volume Encryption Options screen
Step 15. Click [Next], and you will be prompted to specify the size of the Hidden Volume you are about to create
Note: Leave the default Encryption Algorithm and Hash Algorithm settings for the Hidden Volume as they are.
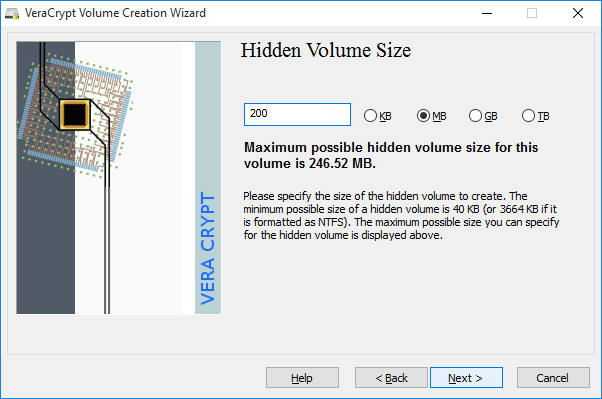
Figure 11: VeraCrypt Hidden Volume Size screen
As when you created your standard volume, consider the number and types of files you intend to store in your hidden volume. Image files and videos, in particular, can fill up a small VeraCrypt container very quickly. Also, make sure to leave some space for decoy files in your standard volume. If you select the maximum size available for the Hidden Volume, you will not be able to put any more files into the existing standard volume. (In this section, we will create a 200 MB hidden volume inside a 250 MB standard volume. This will leave approximately 50 MB of space for decoy files.)
Step 16. Type the size of the volume you would like to create. Make sure you select the correct value for KB (kilobytes), MB (megabytes), GB (gigabytes) or TB (terabytes).
Step 17. Click [Next] to choose a passphrase for your hidden volume.
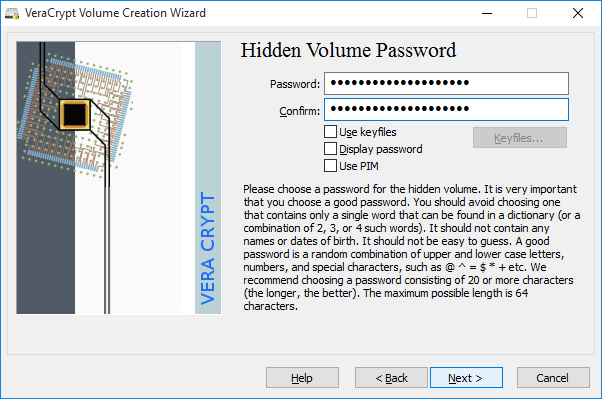
Figure 12: VeraCrypt Hidden Volume Password creation screen
You must now choose a passphrase for the hidden volume that is different from the one you chose for your standard volume. Again, remember to choose a strong passphrase. Please refer to the Create and maintain strong passwords section to learn more.
Tip: If you use a password manager such as KeePassX and are concerned about being pressured to reveal the contents of your VeraCrypt container, you can store the passphrase for your (decoy) standard volume in KeePassX, but you should memorise the passphrase for your hidden volume. Otherwise, by handing over your KeePassX passphrase, you will also reveal your hidden volume passphrase.
Step 18. Choose a passphrase and type it in twice.
Step 19. Click [Next] to activate the Hidden Volume Format screen.
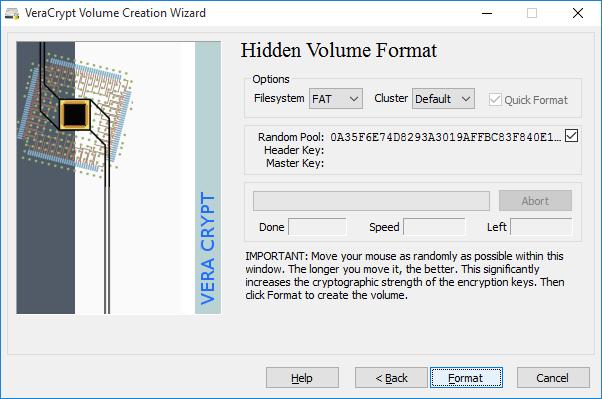
Figure 13: VeraCrypt Hidden Volume Format screen
Step 20. Click [Format] to format the hidden volume.
Note: The default value ("FAT") will work for most people and is compatible with Windows, Mac OS X and Linux computers. However, if you intend to store files that are larger than 4 GB (for a single file), then you will have to select a different file system type. NTFS will work on Windows computers and most Linux computers.
VeraCrypt is now ready to create a standard encrypted volume within a container file. If you move your mouse within the VeraCrypt Volume Creation Wizard window, it will produce random data that will help strengthen the encryption.
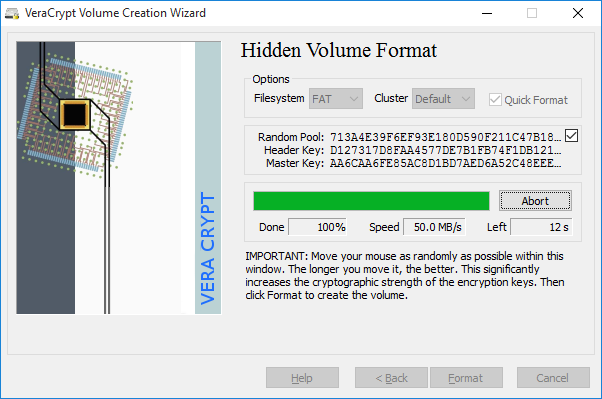
Figure 14: VeraCrypt Hidden Volume Format progress
When VeraCrypt is done, it will display a warning about protecting the files in your hidden volume when adding content to your standard volume.
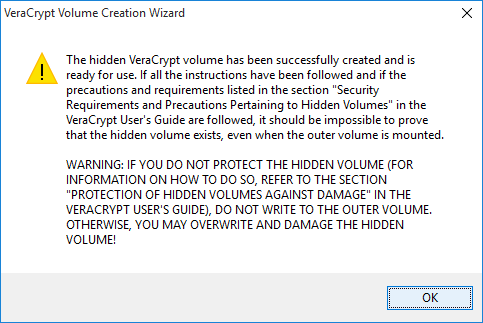
Figure 15: The VeraCrypt Hidden Volume protection warning message
IMPORTANT: This warning is related to how VeraCrypt hides the existence of your (inner) hidden volume. Normally, when you open your (outer) standard volume, both VeraCrypt and Windows will think that it occupies all of the space available within your encrypted container file. About 250 MB in this example. (In fact, we created a 200 MB hidden volume and left only about 50 MB for decoy files in our standard volume.) VeraCrypt can not warn you if you try to copy a 60 MB file into that 50 MB standard volume. This is because, if it did warn you, it would reveal to an observer that you had reserved space for a hidden volume. Instead, it will allow you to copy that 60 MB file. And, by doing so, it will delete or corrupt the files inside your hidden volume.
In other words, this design is based on the assumption that you would rather lose the contents of your hidden volume than reveal their existence.
So, whenever you want to add decoy files to your standard volume, you must check the protect hidden volume against damage... box and enter both your hidden volume passphrase and your standard volume passphrase. If you enable this feature, VeraCrypt will be able to warn you if you try to copy too much data into your outer volume. (Clearly, entering both passphrases in front of someone else will reveal the existence of your hidden volume, so this is something you should only do in private or in the company of those you trust.)
The specific steps required to modify the contents of your standard volume are covered in more detail in the following section, under Protecting your hidden volume when modifying the contents of your outer volume
Step 21. Click [OK] to finish creating your hidden volume.

Figure 16: The VeraCrypt Hidden Volume Created screen
Step 22. Click [OK] to return to the main VeraCrypt window.
You can now store files in your hidden volume. They will remain undetectable even to someone who has obtained the passphrase for your standard volume.
5. Using your VeraCrypt volume
This section of this guide explains how to use standard and hidden VeraCrypt volumes on Windows.
5.1. Mounting a volume
In VeraCrypt, to mount a volume is to make it available for use. When you successfully mount a volume it appears as if you have attached a portable storage device to your computer. You can use this disk as usual to access, create, modify or delete files and folders. When you are done using it, you can dismount it and the new disk will disappear. You mount a hidden volume the same way as a standard volume. Depending on which passphrase you enter, VeraCrypt will determine whether to mount the standard or hidden volume.
To mount your volume, perform the following steps:
Step 1. Launch VeraCrypt (Start > All Apps > VeraCrypt > VeraCrypt) to open the main application window
Step 2. Select a drive from the list in the main window of VeraCrypt
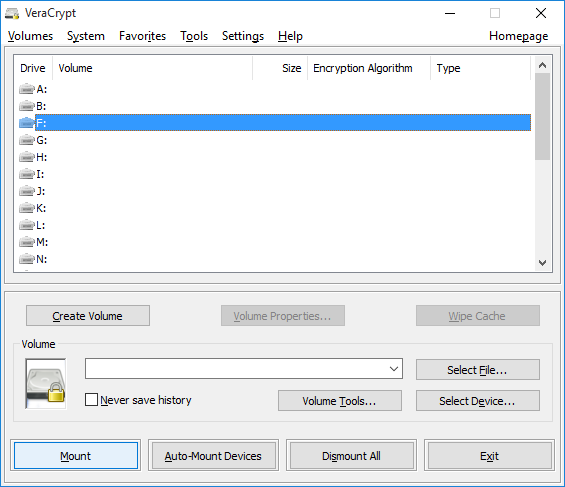
Figure 1: The main window of VeraCrypt with an available drive selected
Note: In Figure 1, we have chosen to mount our encrypted volume on drive F:. You may choose any of the drive letters shown each time you mount a volume.
Step 3. Click [Select File…] and locate your VeraCrypt container file
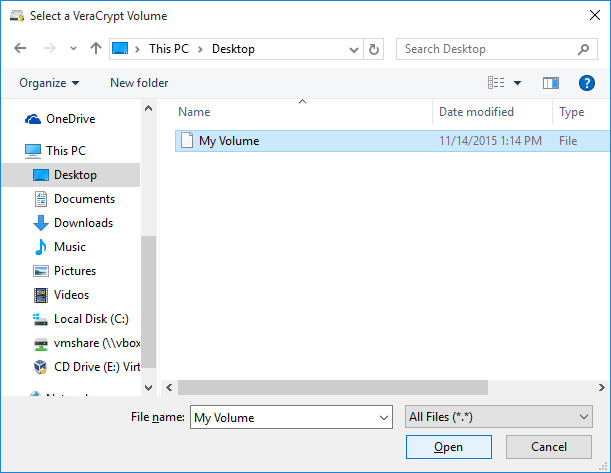
Figure 2: The Select a VeraCrypt Volume screen
Step 4. Select the container file you want to mount, then click [Open] to return to the VeraCrypt main window. The location of your container file will be displayed just to the left of the [Select File...] button you clicked earlier.
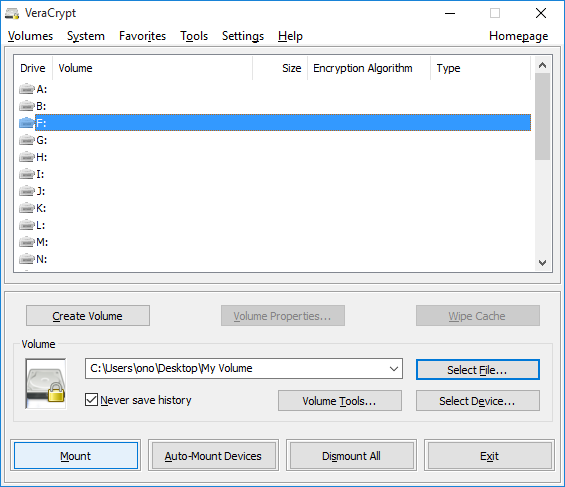
Figure 3: The main window of VeraCrypt with a container selected
Step 5. Click [Mount] to enter your passphrase
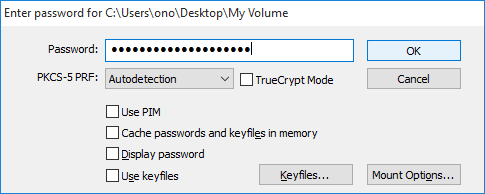
Figure 4: The Enter Password screen
Step 6. Type your passphrase in the Password box.
If your container holds a hidden volume, choose one of the options below:
To open a hidden volume, enter your hidden volume passphrase
To open a standard volume in a container that holds a hidden volume — while being observed by someone from whom you would like to hide the existence of that volume — enter your standard volume passphrase
To open a standard volume in a container that holds a hidden volume — in order to modify your "decoy" files and assuming you are not being observed — please read about protecting your hidden volume when modifying the contents of its outer volume!
Step 7. Click [OK] to begin mounting the standard volume.
If the passphrase you entered is incorrect, VeraCrypt will prompt you to enter it again. If it is correct, your encrypted volume will be mounted as follows:
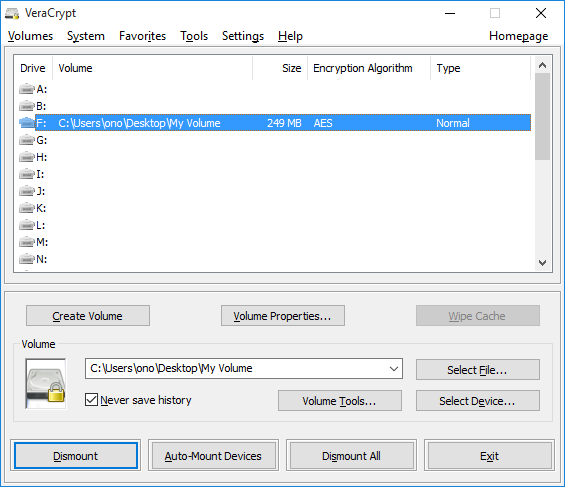
Figure 5: The VeraCrypt main window displaying the newly mounted volume
Step 8. Enter the mounted volume
There are two ways to enter a mounted volume:
- Double click the highlighted entry in the main window of VeraCrypt as shown in Figure 5, above
- Double click the corresponding drive letter (here, we are using F:) within This PC, as shown in Figure 6, below
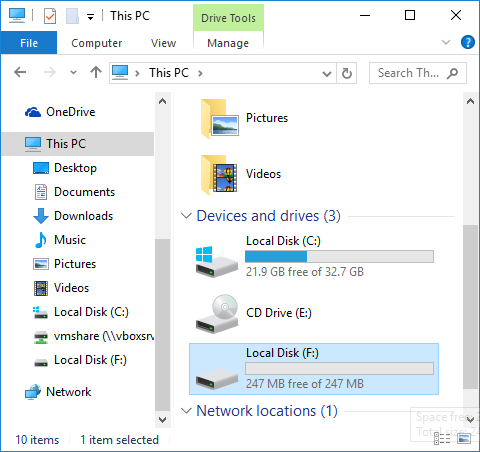
Figure 6: Accessing the VeraCrypt volume through "This PC"
The volume shown below is empty. Once you have stored files there, they will be accessible (and editable) whenever you open the volume.
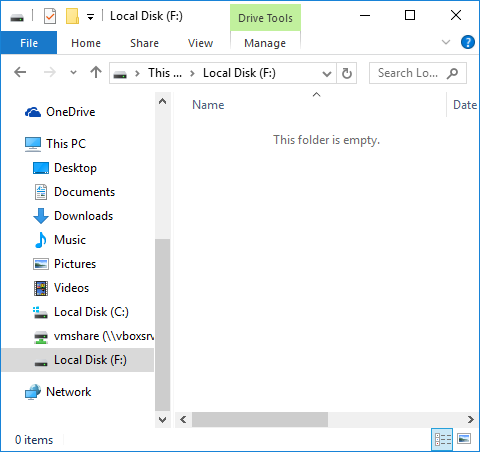
Figure 7: Inside the mounted VeraCrypt volume
This virtual disk behaves like an external storage device, except that it is fully encrypted. You can copy files to and from it just like you would for a USB storage device. By dragging and dropping them, for example, or by saving them directly to the volume from within another application. Files are automatically encrypted when you copy, move or save them to this virtual disk. And, when you move a file out of the VeraCrypt volume, it is automatically decrypted. If your computer is shutdown or switched off suddenly, the encrypted volume will remain inaccessible until it is mounted again.
IMPORTANT: While your VeraCrypt volume is mounted, the files inside are not protected and are freely accessible to anyone with access to your computer. To protect your sensitive files, you must dismount your VeraCrypt volume when you are not using it. Keep this in mind when you step away from your computer and in circumstances where you face an increased risk of confiscation or theft. Leaving your encrypted volumes mounted is like owning a safe and leaving the door wide open. If you shut down, restart or switch off your computer, your encrypted volume will be inaccessible until it is mounted again. You might want to practice doing one of these things as quickly as possible.
Tip: Merely closing the main window by clicking [Exit] is not enough to quit the application completely.
5.2. Dismounting a volume
In VeraCrypt, to dismount a volume is to make it unavailable for use. To dismount a volume and ensure that nobody can access the files within it unless they know the appropriate passphrase, perform the following steps:
Step 1. Select the volume from the list of mounted volumes in the main VeraCrypt window
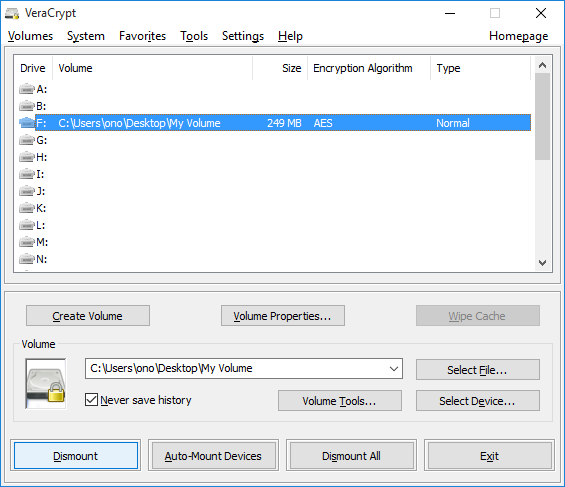
Figure 1: Selecting the Standard Volume to be dismounted
Step 2. Click [Dismount] to dismount the VeraCrypt volume.
To retrieve a file stored in your standard volume once you have closed or dismounted it, you will have to mount it again.
IMPORTANT: Make sure to dismount your VeraCrypt volume before:
- Removing the external USB storage device on which your container is stored (if you have chosen to keep it on one)
- Putting your computer into Standby or Hibernate mode
- Leaving your computer unattended
- Entering a situation in which your computer is more likely than usual to be lost, stolen or confiscated
Step 3. Right click the VeraCrypt System Tray icon — in the lower, right-hand corner of your Windows desktop — and select [Exit] in order to quit VeraCrypt completely.
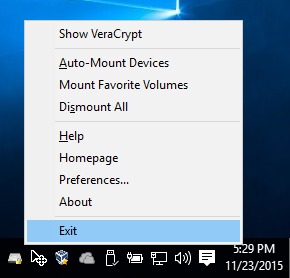
Figure 2: Quitting VeraCrypt cleanly with the System Tray icon
Tip. When using the installed version of VeraCrypt (as opposed to the portable version), merely closing the main window by clicking [Exit] is not enough to exit the application completely.
5.3. Protecting your hidden volume when modifying the contents of its outer volume
As discussed at the end of the section on Creating a hidden volume, when you mount a VeraCrypt volume, you can choose to Protect hidden volume against damage caused by writing to outer volume. This allows you to add new "decoy" files to your standard volume without the risk of accidentally deleting or corrupting the contents of your hidden volume. You should not activate the Protect hidden volume feature when trying to hide the existence of your hidden volume from someone who is forcing you to enter your decoy passphrase, however, because doing so requires that you enter both of your passphrases (which is a pretty clear indication that you have a hidden volume in there somewhere).
When updating your decoy files in private, however, you should always enable this feature. And don't worry, the box will uncheck itself automatically after you dismount the volume.
To use the Protect hidden volume feature, perform the following steps:
Step 1. Select a drive from the list in the main window of VeraCrypt
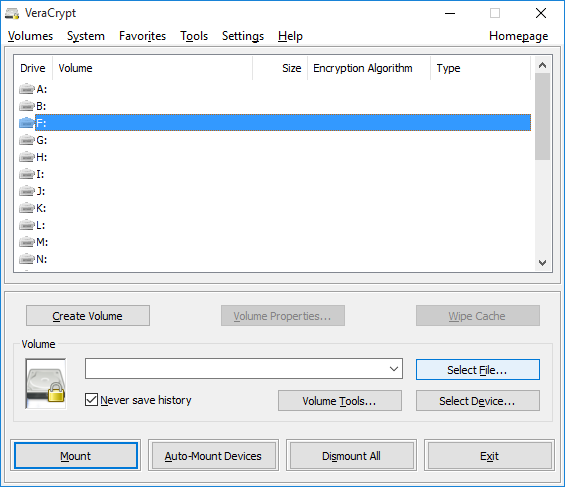
Figure 1: The main window of VeraCrypt with an available drive selected
Note: In figure 1, we have chosen to mount our encrypted volume on drive F:. You may choose any of the drive letters shown each time you mount a volume.
Step 2. Click [Select File…] and locate your VeraCrypt container file
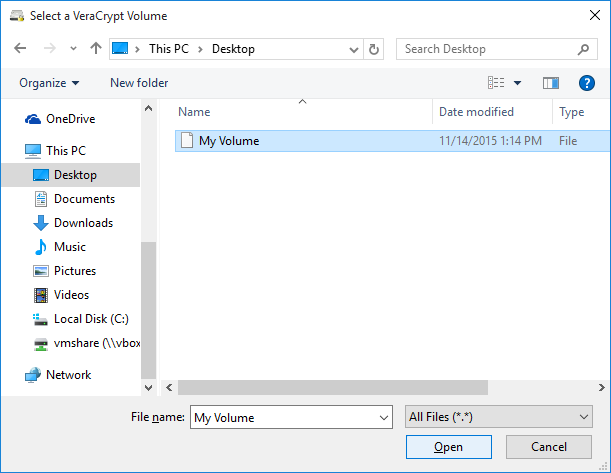
Figure 2: The Select a VeraCrypt Volume screen
Step 3. Select the container file you want to mount, then click [Open] to return to the VeraCrypt main window. The location of your container file will be displayed just to the left of the [Select File...] button you clicked earlier.
Figure 3: The main window of VeraCrypt with a container selected
Step 4. Click [Mount] to open the Enter Password screen

Figure 4: The Enter Password screen
Step 5. Type your outer volume passphrase in the Password box, as if you were going to mount it normally, but do not click [OK]
Step 6. Click [Mount Options...], which will allow you to protect your hidden volume while modifying the contents of your standard volume
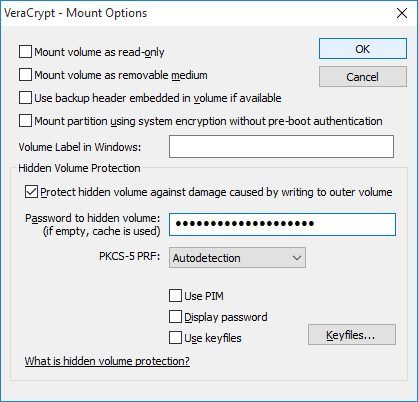
Figure 5: VeraCrypt's Mount Options screen
Step 7. Check the box labelled Protect hidden volume against damage caused by writing to outer volume
Step 8. Type your hidden volume passphrase where indicated
Step 9. Click [OK] to return to the password prompt
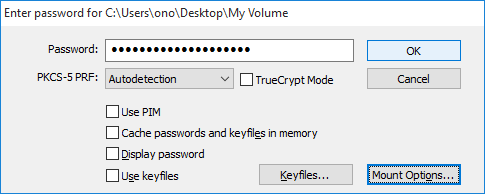
Figure 6: VeraCrypt's Enter Password screen with the hidden volume protected
Step 10. Click [OK] to mount your standard volume while protecting your hidden volume from accidental damage. VeraCrypt will let you know when it's done.
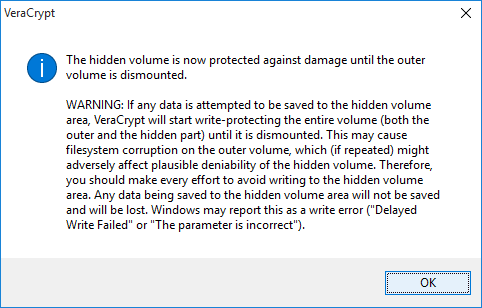
Figure 7: VeraCrypt's "Hidden volume is now protected" screen
Step 11. Click [OK] to return to the main VeraCrypt window
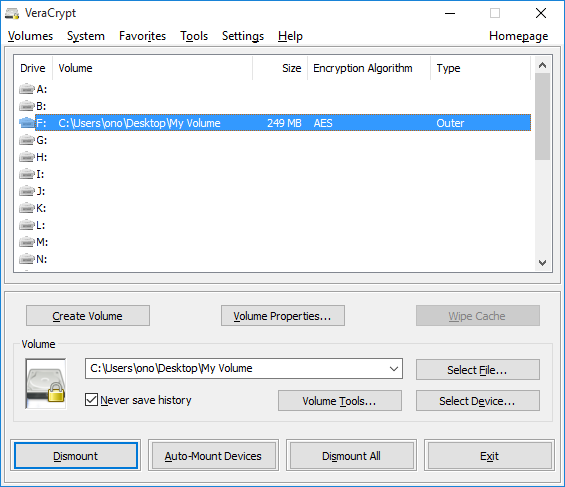
Figure 8: VeraCrypt's "Hidden volume is now protected" screen
Step 12. Enter the mounted volume
As when mounting a volume normally, there are two ways to enter a mounted volume:
- Double click the highlighted entry in the main window of VeraCrypt as shown in Figure 8, above
- Double click the corresponding drive letter (here, we are using F:) within This PC
The volume shown below is empty. But, once you have stored "decoy" files in your standard volume, they will be accessible whenever you mount it. And, if you have protected your hidden volume with the steps above, you will be able to add or modify files.
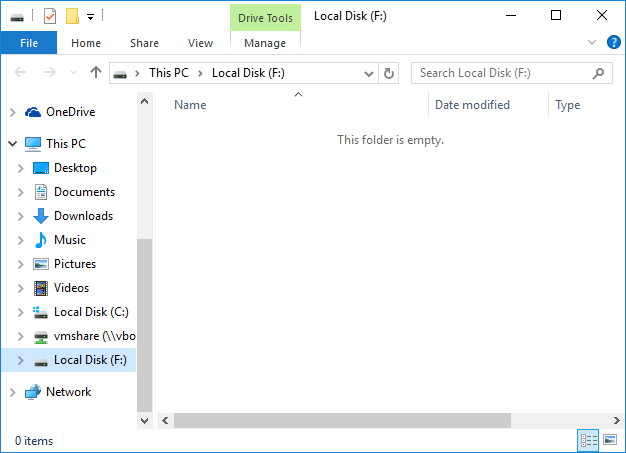
Figure 9: Inside the mounted VeraCrypt standard volume with a protected hidden volume
When you are done modifying the contents of your standard volume, you can dismount it by following the usual steps, which are described under Dismounting a volume, above. And, the next time you go to mount a volume, the Protect hidden volume against damage caused by writing to outer volume box will be unchecked by default.
6. Managing your VeraCrypt container
6.1. Importing content from a TrueCrypt volume
VeraCrypt can mount TrueCrypt volumes. Given that TrueCrypt is no longer maintained, however, you should move your files to a VeraCrypt volume as soon as possible. The easiest way to do this is to:
- Create a new VeraCrypt volume as large as (or larger than) your existing TrueCrypt volume,
- Open both volumes at the same time, and
- Copy everything from the TrueCrypt volume to the VeraCrypt volume
For the first item, above, see Creating a standard volume (and, if appropriate, Creating a hidden volume). This section assumes that you already have one or more appropriately sized VeraCrypt volumes. The steps below address the process of moving files from a TrueCrypt standard volume to a VeraCrypt standard volume that has already been mounted. If you have files in both the standard and hidden volumes of a TrueCrypt container, simply make sure that your VeraCrypt volumes are large enough, then work through the following steps twice — once for each volume.
With the VeraCrypt main window open, and your new VeraCrypt volume mounted, carry out the following steps:
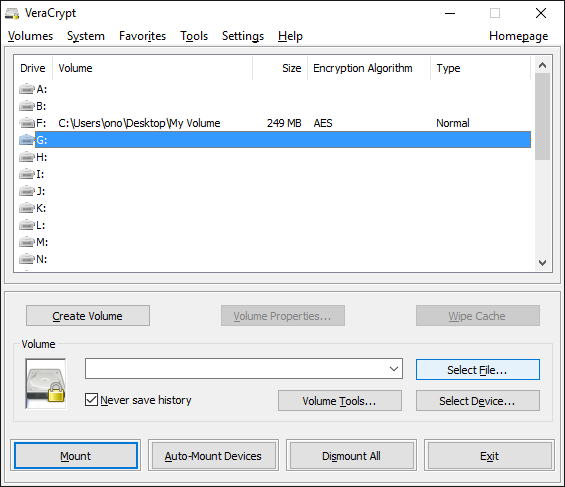
Figure 1: VeraCrypt's main window showing a mounted volume
Step 1. Click a drive letter that is not already taken by a mounted VeraCrypt volume
Step 2. Click [Select File...] to choose your TrueCrypt container
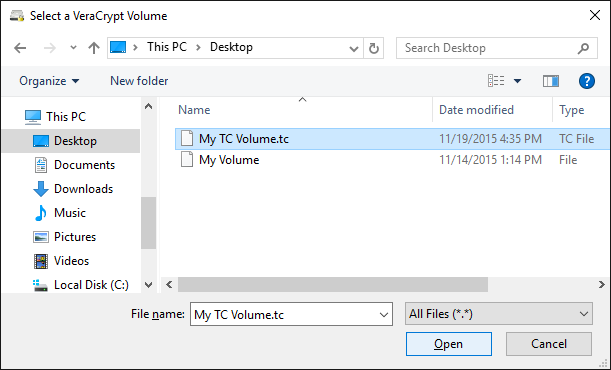
Figure 2: Choosing a TrueCrypt container
Step 3. Navigate to your TrueCrypt container
Step 4. Click [Open] to return to the main window
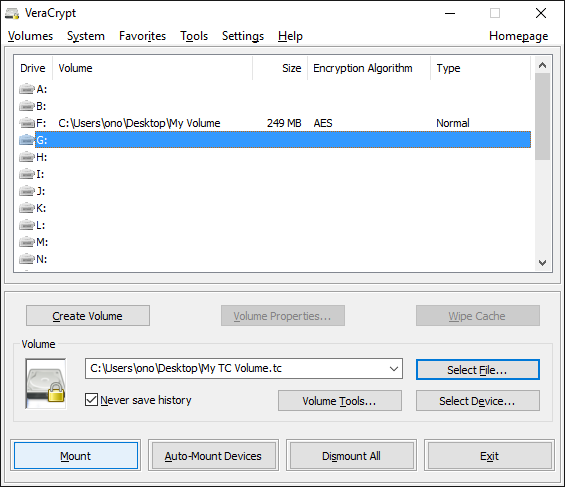
Figure 3: VeraCrypt's main window with a TrueCrypt container selected
Step 5. Click [Mount] to enter the passphrase for your TrueCrypt volume
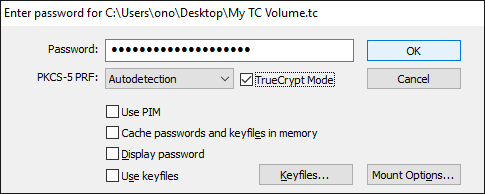
Figure 4: The VeraCrypt password screen in TrueCrypt mode
Step 6. Check the TrueCrypt Mode box
Step 7. Type the passphrase for your TrueCrypt volume
Step 8. Click [OK] to return to the main window
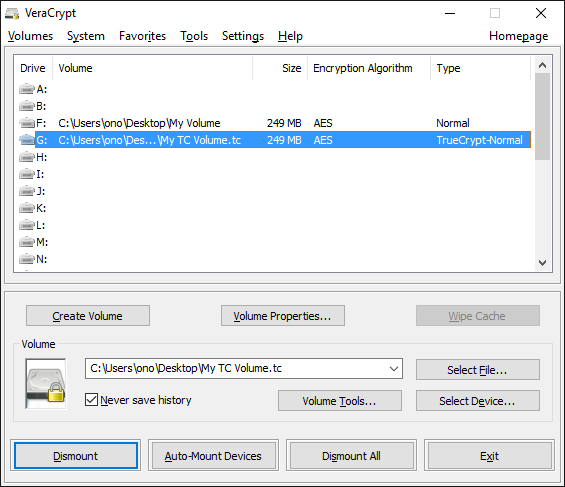
Figure 5: VeraCrypt's main window with both volumes mounted
Step 9. Double click the drive letter for your mounted TrueCrypt volume to enter it
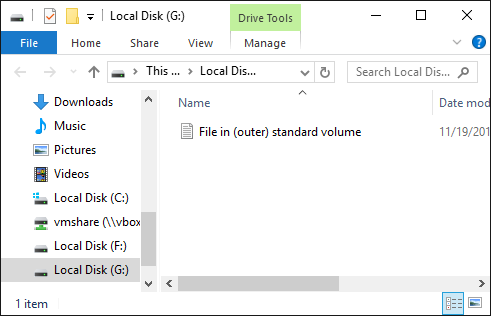
Figure 6: Inside the mounted TrueCrypt volume
Step 10. Return to the main window
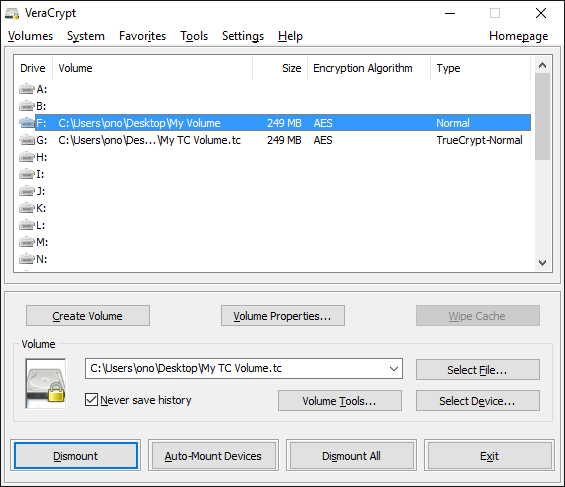
Figure 7: VeraCrypt's main window with both volumes mounted
Step 11. Double click the drive letter for your mounted VeraCrypt container to enter it
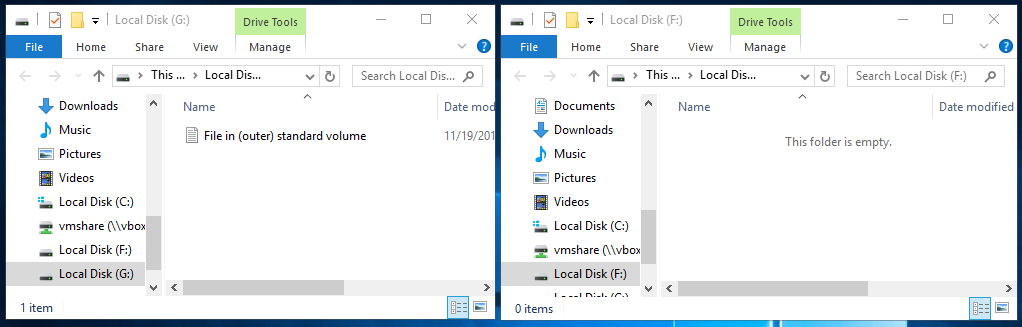
Figure 8: TrueCrypt and VeraCrypt volumes mounted and displayed side-by-side
Step 12. Select the contents of your TrueCrypt volume and drag them to window representing your VeraCrypt volume.
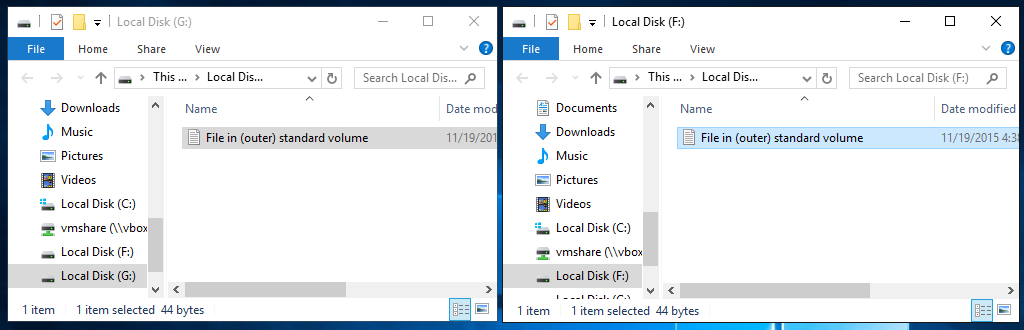
Figure 9: Contents of a TrueCrypt volume copied to a VeraCrypt volume
After your files have been copied over, you should dismount both volumes.
Step 13. Return to VeraCrypt's main window
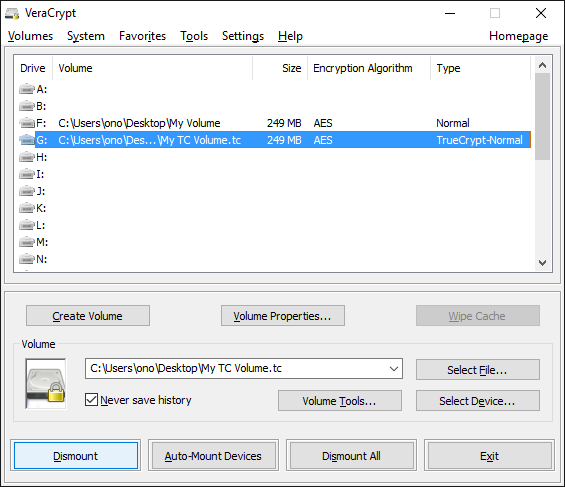
Figure 10: VeraCrypt's main window
Step 14. Select the drive letter for your mounted TrueCrypt volume
Step 15. Click [Dismount] to dismount your TrueCrypt volume
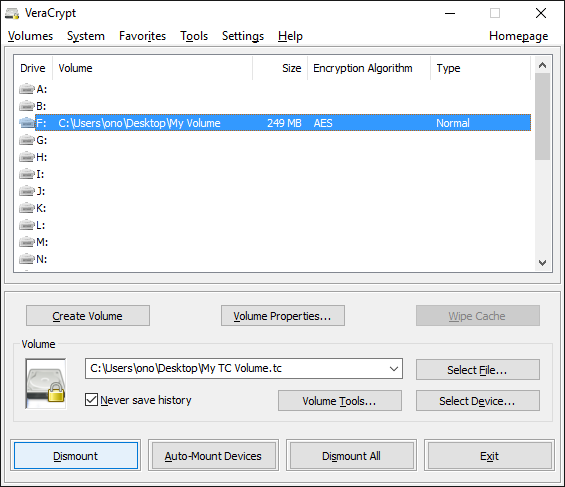
Figure 11: VeraCrypt's main window
Step 16. Select the drive letter for your mounted VeraCrypt volume
Step 17. Click [Dismount] to dismount your VeraCrypt volume
6.2. Changing one or both passphrases for a container
To change the passphrase of a VeraCrypt volume, start from the main screen and follow the steps below. These steps apply to both standard volumes and hidden volumes within VeraCrypt containers. However, if you want to change both passphrases, you will need to go through this process twice.
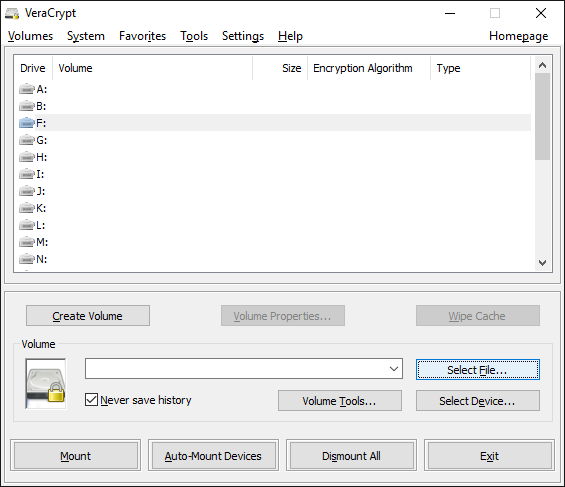
Figure 1: VeraCrypt's main window
Step 1. Click [Select File...] to choose the container for which you want to change the passphrase
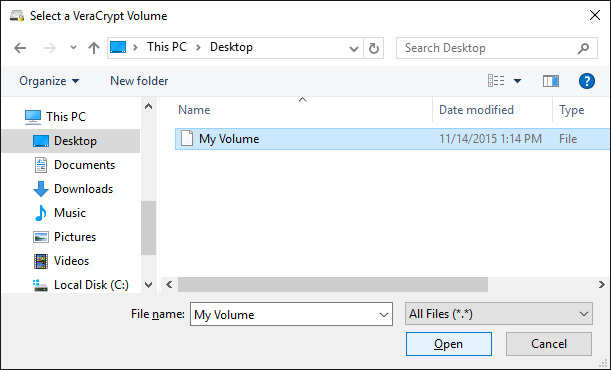
Figure 2: Selecting a container file in VeraCrypt
Step 2. Select your VeraCrypt container
Step 3. Click [Open] to return to the main window
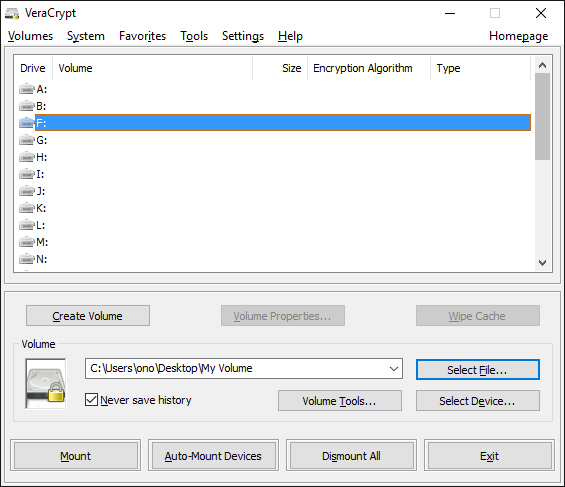
Figure 3: VeraCrypt's main window
Step 4. Click [Volumes]
Step 5. Select [Change Volume Password...] as shown below
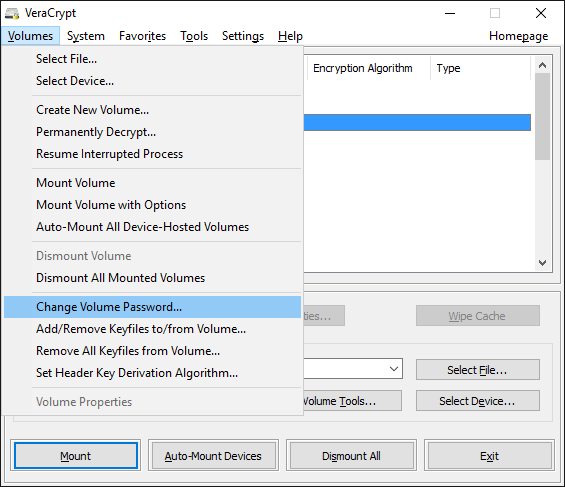
Figure 4: Changing the passphrase of a VeraCrypt volume
This will activate the Change Password screen
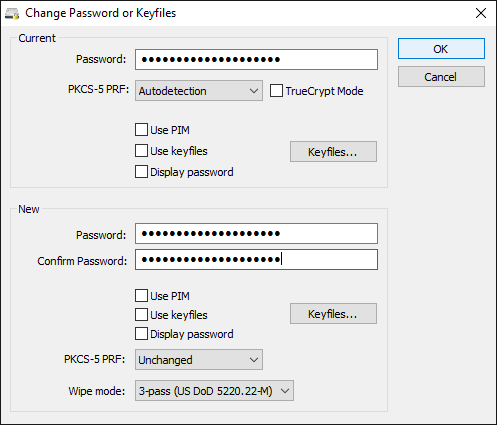
Figure 5: VeraCrypt's Change Password screen
Tip: If you have both a standard volume and a hidden volume in this container, VeraCrypt will automatically determine which password to change based on what you enter in the [Current Password] field. If you want to change both passwords, you will need to go through this process twice.
Step 6. Type your current passphrase
Step 7. Type your new passphrase twice
Step 8. Click [OK] to begin generating a new key.
Note: Older versions of VeraCrypt may display a warning about your "Personal Iterations Multiplier (PIM)" value even though you have chosen a strong passphrase. If you see this warning, double check that your passphrase is longer than 20 characters and that the Use PIM box is unchecked. Then click [Yes] to continue.
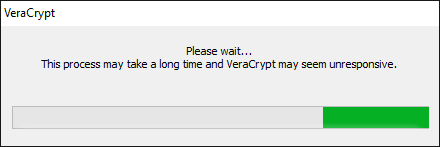
Figure 6: VeraCrypt password change progress bar
When it is ready, VeraCrypt will display the Random Pool Enrichment screen.
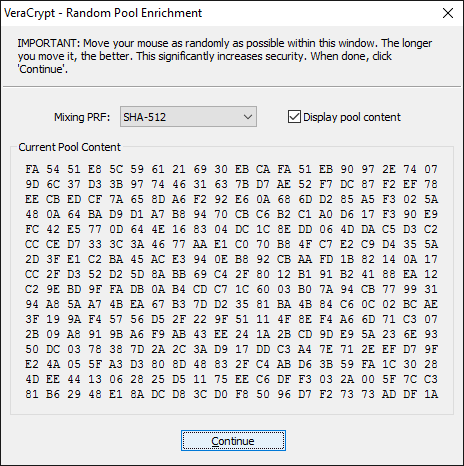
Figure 7: VeraCrypt's Random Pool Enrichment screen
Tip: By moving your mouse around within the Random Pool Enrichment screen, you can increase the strength of the encryption that VeraCrypt provides.
Step 9. Click [Continue] to continue the process of changing your passphrase.
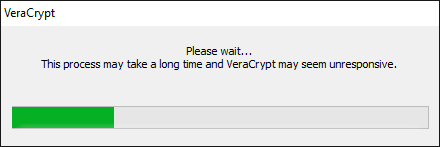
Figure 8: VeraCrypt's password change progress bar
VeraCrypt will let you know when it is done generating a new key for your encrypted volume

Figure 9: VeraCrypt passphrase successfully changed
Step 10. Click [OK] to complete the process of changing your passphrase
IMPORTANT: Changing your passphrase does not change the actual encryption key used to protect your data. Practically, this means that anyone with the following three things may be able to access the files in your VeraCrypt container even after you have changed its passphrase:
- A copy of your "old" VeraCrypt container (from before you changed the passphrase)
- The passphrase to that old VeraCrypt container
- A copy of your "new" VeraCrypt container (from after you changed the passphrase)
So, if you suspect that someone might have both a copy of your container and knowledge of its passphrase, you should do more than just change your passphrase. You should instead generate an entirely new container (with a new passphrase), then copy over your files and delete the old container.
7. Portable VeraCrypt
7.1. Differences between the installed and portable versions of VeraCrypt
By extracting VeraCrypt in portable mode, you can use it to protect your sensitive files without installing the software on your computer in the usual way. In some situations, this approach might help you hide the fact that you use VeraCrypt at all. This, in turn, will make it less apparent that you are storing encrypted data.
If you extract the portable version of VeraCrypt onto a USB storage device, along with your encrypted container file, you will be able to access your files on almost Windows computer. Keep in mind, however, that your external storage devices are only as safe as the computers to which you attach them. Indiscriminately decrypting your sensitive files on unfamiliar hardware can expose you to malware capable of reading the contents of your encrypted volume while it is "open" (or even capturing your VeraCrypt passphrase when you enter it).
There are very few differences between the installed and portable versions of VeraCrypt, the most significant being that the portable version does not allow you to encrypt your system disk. It works best with encrypted container files.
7.2. Extracting the portable version of VeraCrypt
Note: You must create the folder into which you will extract the portable version of VeraCrypt — typically on a USB storage device or somewhere on your hard drive — before you extract it
Step 1. Navigate to the location where you would like to extract the portable version of VeraCrypt
Step 2. Right-click to activate its contextual menu.
Step 3. Select the New menu item, then select the Folder sub-menu item, as shown below
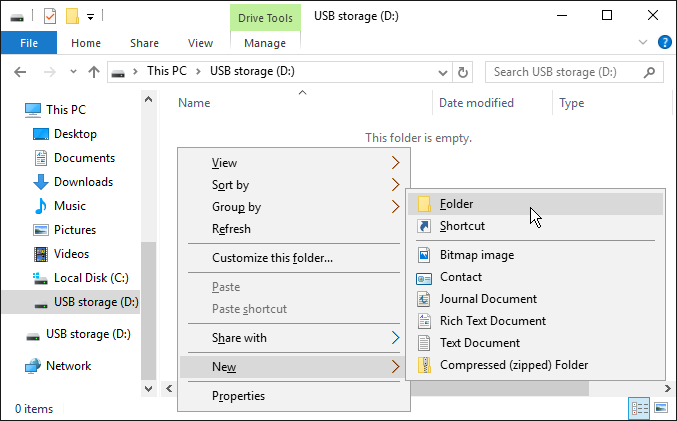
Figure 1: Creating a folder on Windows
Step 4. Type a name for the folder into which you are about to extract VeraCrypt
Step 5. Press Enter to finish naming the new folder
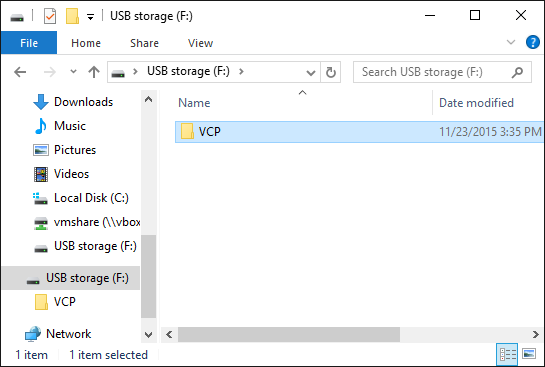
Figure 2: Naming a folder on Windows
Step 6. Double-click the VeraCrypt installer to open the installation screen
Figure 3: The VeraCrypt installer
Step 7. Double-click the VeraCrypt installer to activate the User Account Control screen
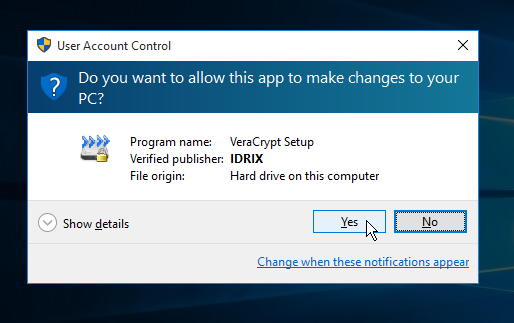
Figure 4: The VeraCrypt User Account Control screen
Step 8. Click [Yes] to load the license screen
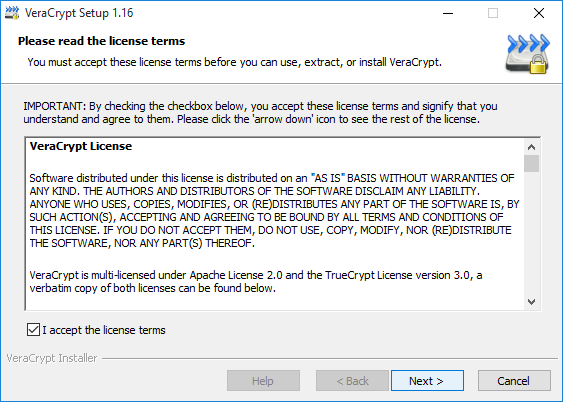
Figure 5: The VeraCrypt license screen
Step 9. Click I accept the license terms
Step 10. Click [Next] to activate the installer
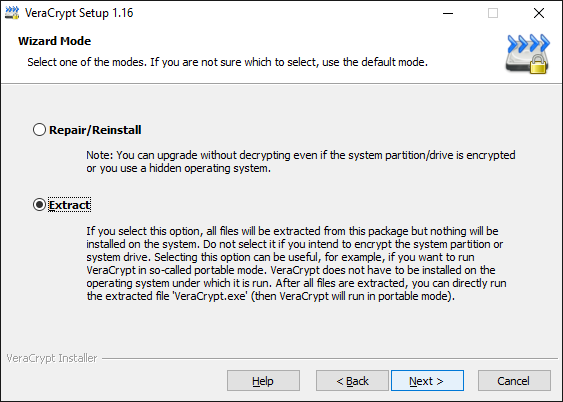
Figure 6: The main VeraCrypt installation screen
Step 11. Select Extract
Step 12. Click [Next] to activate the driver warning screen
The two warning screens below are just VeraCrypt's way of telling you that you will have to dismiss a User Account Control (UAC) screen every time you launch the portable version of VeraCrypt. (You will not have to do this if you install the software normally.)
Figure 7: A message related to how the portable version of VeraCrypt installs Windows drivers
Step 13. Click [OK] to activate yet another driver-related warning screen
Figure 8: A warning about the need to acknowledge a User Account Control warning when starting the portable version of VeraCrypt
Step 14. Click [Yes] to begin choosing your extraction location
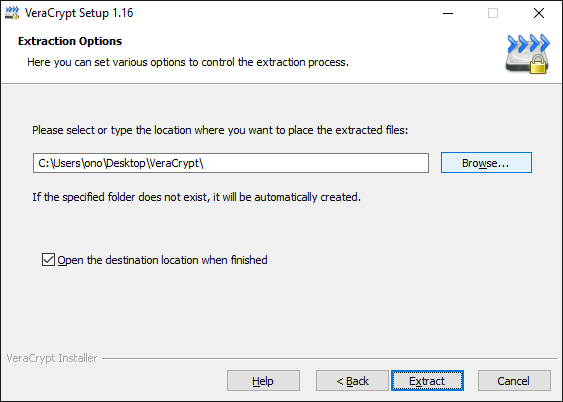
Figure 9: The Extraction Options screen
Step 15. Click [Browse] to choose your extraction location

Figure 10: Choosing where to extract the portable version of VeraCrypt
In this guide, we will extract the portable version of VeraCrypt into the "VCP" folder that we created in Step 1. This folder is located inside the a USB storage device called "USB Storage (D:)".
Step 16. Locate and select the folder inside which you would like to extract the portable version of VeraCrypt.
Step 17. Click [OK] to return to the Extraction Options screen
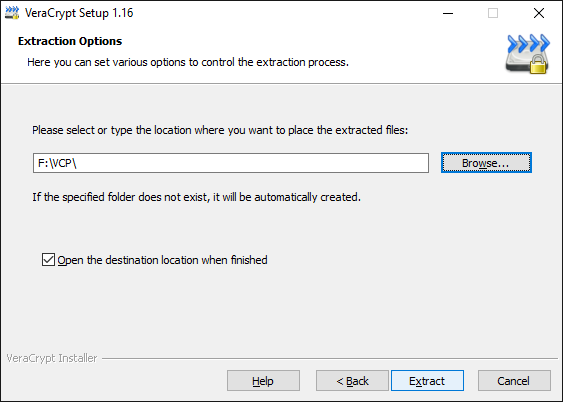
Figure 11: The Extraction Options screen after choosing a location
Step 18. Click [Extract] to begin extracting VeraCrypt. The VeraCrypt installer will let you know when it is done.
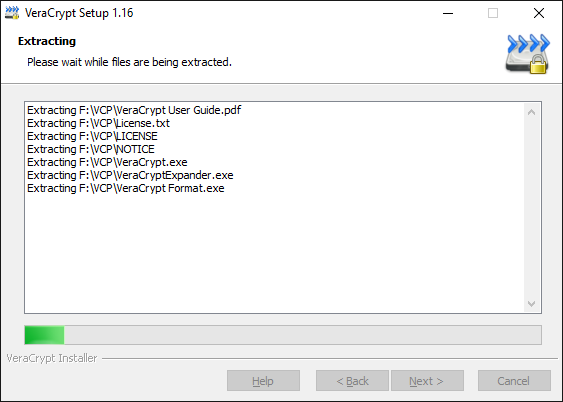
Figure 12: The file extraction progress screen
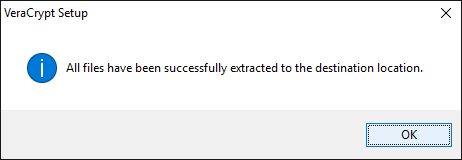
Figure 13: The portable version of VeraCrypt successfully extracted
Step 19. Click [OK] to activate the donation prompt
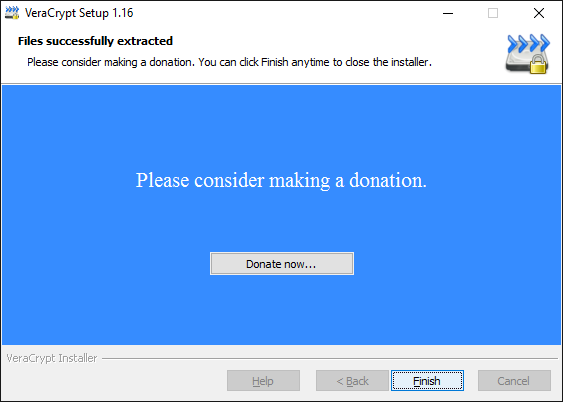
Figure 14: VeraCrypt donation prompt
Step 20. Click [Finish] to complete the extraction of the portable version of VeraCrypt
IMPORTANT: If you have extracted the portable version of VeraCrypt to a USB storage device in order to hide the fact that you are using it on your computer, be sure to delete the installer from your computer.
7.3. Launching the portable version of VeraCrypt
Step 1. Navigate to the folder where you extracted the portable version of VeraCrypt
Step 2. Double click either the VeraCrypt file (Figure 1, below) or the VeraCrypt-x64 file (Figure 2), depending on whether your Windows system is 32 bit or 64 bit
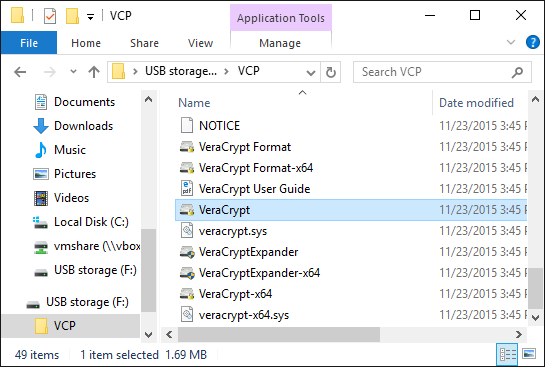
Figure 1: The 32 bit portable VeraCrypt launcher
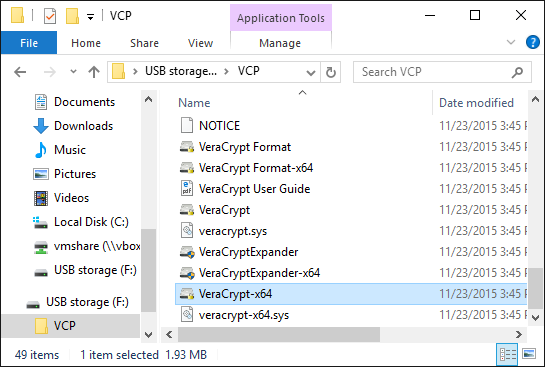
Figure 2: The 64 bit portable VeraCrypt launcher
This will activate the VeraCrypt User Account Control window
Figure 2: The VeraCrypt User Account Control screen
Step 3. Click [Yes] to launch the portable version of VeraCrypt
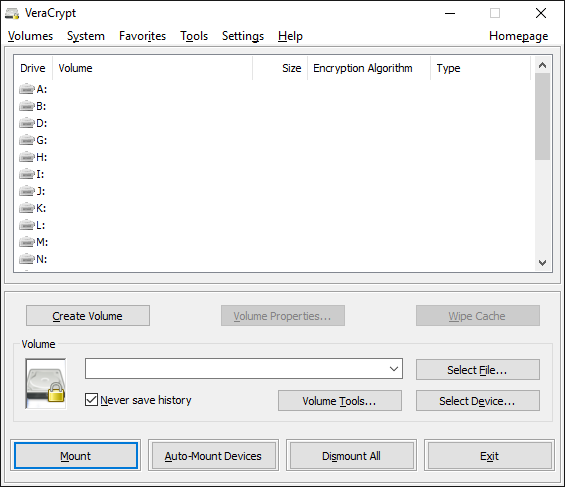
Figure 3: The main VeraCrypt window
You can now use VeraCrypt, as usual, to create, manage, mount and dismount encrypted volumes. When you quit the portable version of VeraCrypt, it will unload its Windows drivers and exit cleanly. If you are running the portable version of VeraCrypt from a USB storage device, make sure you close your open volumes and exit the program before ejecting and removing the storage device.
Tip: In order to exit completely from the installed version of VeraCrypt — even after you have have clicked [Exit] to close the main window — you have to right-click on the System Tray icon and select [Exit]. The portable version does not require this additional step.
FAQ
Q: Am I going to have to spend all my time typing passphrases into VeraCrypt?
A: No, you only need to enter your passphrase once to open an encrypted volume. After that, you can access your files without a passphrase until you close the volume
Q: Can I uninstall VeraCrypt if I don't want it any more? If I do, will my files remain encrypted?
A: Yes. You can uninstall VeraCrypt by opening Terminal, typing sudo veracrypt-uninstall.sh and entering the passphrase you use to login to your computer. You can later reinstall VeraCrypt to access the files in your containers, which will remain encrypted and will not be deleted when you remove VeraCrypt. Similarly, if you transfer your encrypted container file another computer, you will need your passphrase and the VeraCrypt program to open it.
Q: What kinds of information require encryption?
A: Ideally, you should encrypt all your documents, pictures and any other files that contain private and sensitive information. And, if your operating system supports it, you should configure full disk encryption so that all of your files are encrypted whenever your computer is turned off
Q: How secure will my files be?
A: VeraCrypt has been independently tested and reviewed by security experts to verify how well it performs and to determine whether or not it provides all of the functions it claims to support. The results suggest that VeraCrypt offers a very high level of protection. However, choosing a strong passphrase is essential to the security of your data.
Q: Why would I use a hidden volume?
A: VeraCrypt's standard volumes protect your files with strong encryption. Hidden volumes, which provide the same level of encryption, are designed to give you more options if someone demands your VeraCrypt passphrase. Rather than giving up your hidden volume passphrase, you can give up your standard volume passphrase. If asked, you can deny that you have a hidden volume. To use this feature properly, however, you will a strong grasp of your own security environment, a good understanding of how VeraCrypt works and a convincing set of "decoy" files in your standard volume.
Q: How do I mount my original standard volume, rather than the one that's hidden?
A: It all depends on which passphrase you enter in the password screen. If you enter the standard volume passphrase, VeraCrypt will mount the standard volume. If you enter the hidden volume passphrase, VeraCrypt will mount the hidden volume. That way, if someone demands that you open your VeraCrypt container, you can mount the standard volume and deny the existence of a hidden volume. Under the right circumstances, this might be enough to get you off the hook and out of trouble.
Q: Is it possible to inadvertently damage or delete a hidden volume?
A: Yes. If you continue adding files to your standard volume until you run out of space for your hidden volume, your hidden volume will be damaged or destroyed. There is an option when you mount the standard volume that you can use to protect your hidden volume from being damaged when modifying the contents of your standard volume. You should not use this option while being observed, as it reveals the existence of a hidden volume.
Q: Can I change the size of a VeraCrypt volume after creating it?
A: No. You will have to create a new container with a larger volume, then move your files form the old volume to the new one. You can do this by mounting both volumes at the same time. This applies to both standard and hidden volumes.
Q: Can I use tools like chkdsk on the contents of a mounted VeraCrypt volume?
A: VeraCrypt volumes behave like normal storage devices, so it is possible to use any file system checking/repairing/defragmenting tools on the contents of any mounted VeraCrypt volume.
Q: Is it possible to change the passphrase for a hidden volume?
A: Yes. The passphrase change feature applies to both standard and hidden volumes. Just type the passphrase for the hidden volume into the Current Password field of the Password Change screen.