CCleaner for Windows - secure file deletion and session cleanup
Actualizado 9 August 2014
Está guía no está actualizada
CCleaner is an easy-to-use and efficient program, essential to protecting your digital privacy and security. By permanently deleting (or wiping) your browser history, cookies, other temporary files created during your work session, as well as free disk space, CCleaner limits the ways in which hostile or malicious parties can monitor your work habits and preferences or infect your system.
Required reading
What you will get from this guide
- The ability to permanently delete traces of your activities and temporary files stored on your computer.
- The ability to wipe the free space on disks connected to your computer.
- The ability to clean up the Windows Registry.
- The ability to control what programs are run when your computer starts.
1. Introduction to CCleaner
1.0 Other tools like CCleaner
Aother excellent temporary file removal and shredder tool compatible with GNU Linux and Microsoft Windows is BleachBit. BleachBit lets you wipe temporary files in 70 of the most popular applications, operating system temporary files and free hard disk space. An open-source program with a portable version, BleachBit is available in 32 languages.
CCleaner is also available for Mac OS, but users will appreciate free tools from Titanium’s Software, OnyX and Maintenance to erase traces of your work session.
To securely wipe your Trash, open the Finder menu and then select Finder > Secure Empty Trash.... To always securely wipe your Trash, select Finder > Preferences and then click the Advanced tab. Next, check the Empty Trash securely option. To wipe free space on the disk, run the Disk Utility system application, select the disk partition, choose Erase tab, and then click the Erase Free Space.. button.
1.1 Things you should know about CCleaner before you start
The default settings on your computer system or an Internet browser automatically collect and create a data trail that a knowledgeable hostile or malicious party can follow. Every time you use an Internet browser or word processor, or program, temporary data and files are generated and stored on your computer system. It could also generate lists of recently viewed documents or web pages. For example, whenever you type a web address into your Internet browser, a list of those addresses beginning with that/those letter(s) may be displayed as follows:
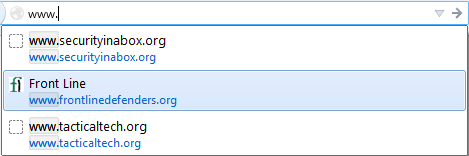
Figure 1: An Internet browser address bar displaying different URLs.
Although browser histories may be convenient, they also let someone identify the web sites you have visited. Moreover, your recent activities may be exposed by temporary data collected from images that appear on those web sites, including email messages or information typed into Internet forms.
To remove temporary data created every time you use a program, you would have to open each individual program directory, identify and then manually delete its temporary program files from there. CCleaner simply displays a list of programs and lets you choose the program(s) from which all temporary files should be deleted.
Important: Although CCleaner only erases temporary files, and not the actual documents saved on your computer, it is strongly recommended that you keep an up-to-date backup of your documents (please refer to the How-to Booklet chapter How to Recover from Information Loss for more information on how to perform a backup).
After running CCleaner you may lose your all browser and recent document histories, and saved passwords. However, this is precisely the point of this tool - to minimize the different ways of infecting or monitoring your computer system.
2. Install and Configure CCleaner
As described in detail in the How-to Booklet chapter How to Destroy Sensitive Information, the Microsoft Windows standard file deletion methods do not erase the actual data from the disk (even when you have emptied the Recycle Bin). This also applies to temporary files. To delete them permanently (that is, to wipe them) from the hard disk, the files must be overwritten with random data. CCleaner must be configured to overwrite any deleted files in order to securely delete them, as it will not do so in default mode. CCleaner can also securely delete old information by wiping any free disk space (please refer to section How to Wipe Free Disk Space Using CCleaner).
2.1 Install CCleaner
Installing CCleaner is a relatively easy and quick procedure. To begin installing CCleaner, perform the following steps:
Step 1. Double click  to begin the installation process. The Warning dialog box may appear. If it does, click
 to activate the following screen:
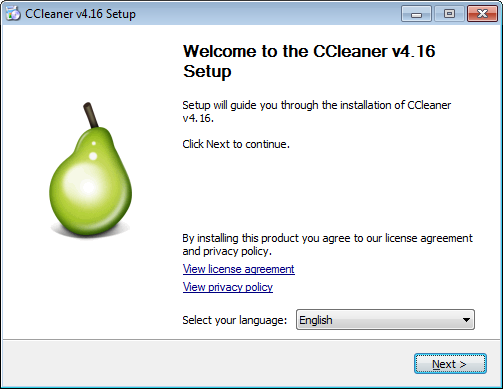
Figure 1: Welcome to the CCleaner v4.03 Setup window
Step 2. Click  to activate the Install Options - Select any additional options window, and then click again to activate the following screen:
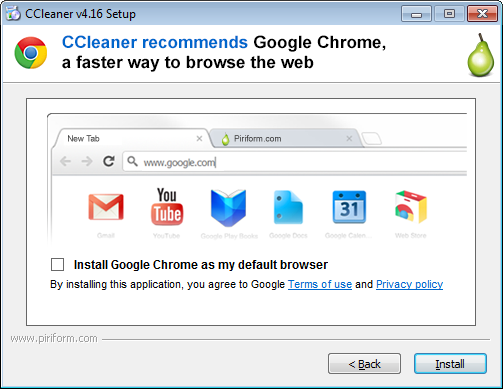
Figure 2: The untitled Install Google Chrome as my default browser window
Step 3. Click to disable the Install Google Chrome as my default browser option as shown in Figure 2 above, to prevent it from automatically installing itself on your computer. Note, that this screen may not appear in during your installation.
Step 4. Click  to activate the Installing screen, displaying its installation progress status bar.
Step 5. Click  to complete installing CCleaner, and activate the following pop-up message:
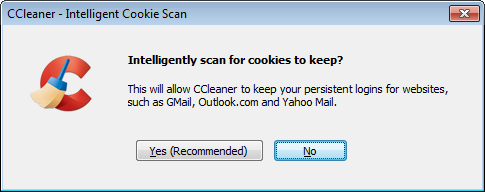
Figure 3: The CCleaner Intelligent Cookie Scan pop-up message
Step 6. Click  to avoid storing cookies permanently on your computer, and activate the CCleaner main console.
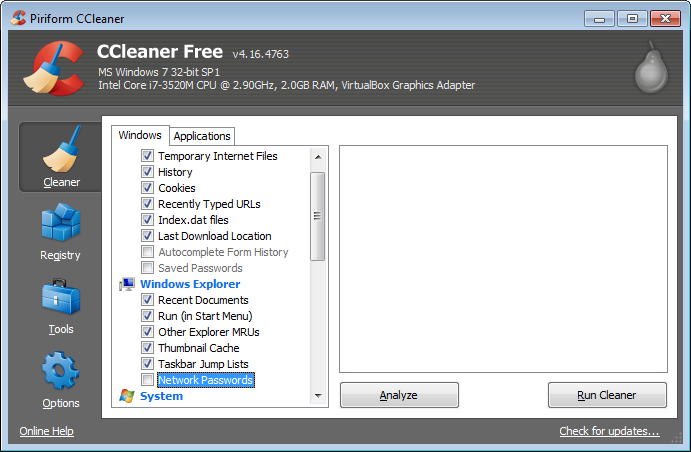
Figure 4: The Piriform CCleaner main console
2.2 Configure CCleaner
Before you begin using CCleaner, it should be configured to securely delete all temporary files.
To configure CCleaner, perform the following steps:
Step 1. Either click  or select Start > Programs > CCleaner to activate the Piriform CCleaner console.
Step 2. Click  to activate the following screen:
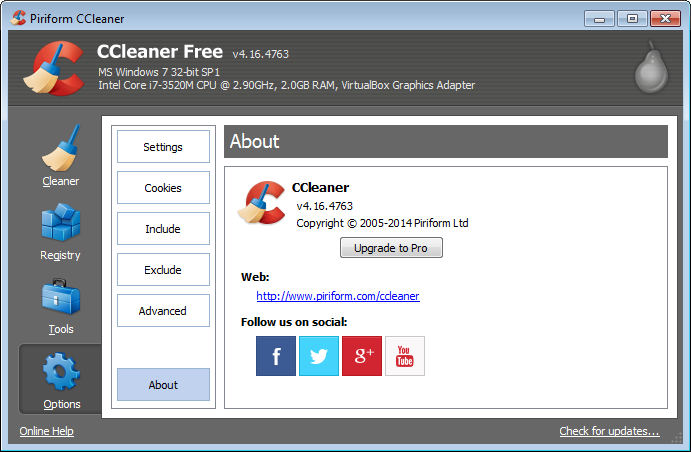
Figure 6: The Options tab displaying the default About pane
Step 3. Click  to activate the Settings pane. The Settings pane lets you choose the language you are most comfortable working in, and determine how CCleaner will delete temporary files and wipe drives.
Note: The Secure Deletion section appears with the Normal file deletion option enabled.
Step 4. Click the Secure file deletion (Slower) option to enable the drop-down list.
Step 5. Expand the Secure file deletion (Slower) drop-down list and select the Advanced Overwrite (3 passes) item to resemble the following screen:
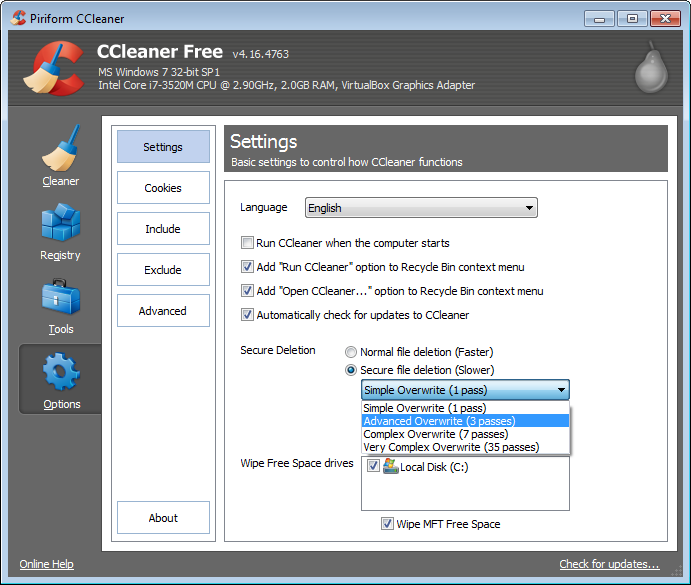
Figure 5: The Settings pane displaying the Secure Deletion options
After you have set this option, CCleaner will overwrite the files and folders you have selected for deletion with random data, effectively wiping them from your hard disk. The passes in the Secure deletion drop-down list, refer to the number of times your data will be overwritten by random data. The greater the number of passes selected, the more times your document, file or folder will be overwritten with random data. This reduces the recoverability of that document, file or folder, but increases the length of time required by the wiping process.
3. Delete temporary files
In this section, we will learn how to delete all the temporary files created by Microsoft Windows and most applications that you use on your computer.
Step 1. Click or select Start > Programs > CCleaner to activate the CCleaner console.
Step 2. Click  to activate the following screen:
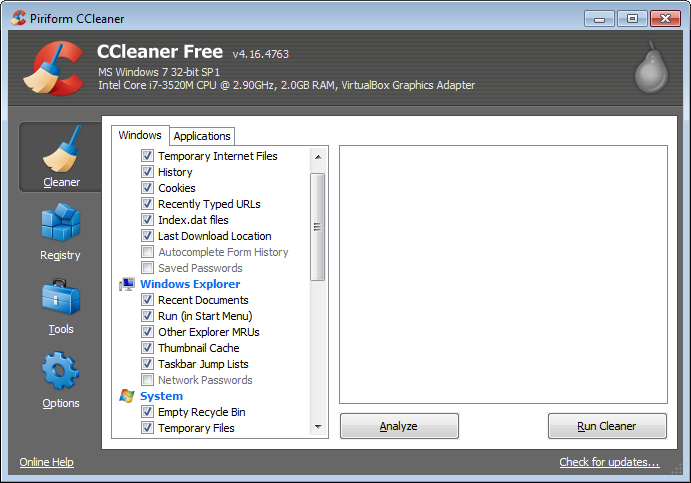
Figure 1: The CCleaner console displaying the Cleaner pane
The Cleaner window is divided into two panes, the left pane displaying the Windows and Application tabs, and the right pane featuring an empty space to display information or results from a given cleaning operation. The Analyze and Run Cleaner buttons are located beneath that space.
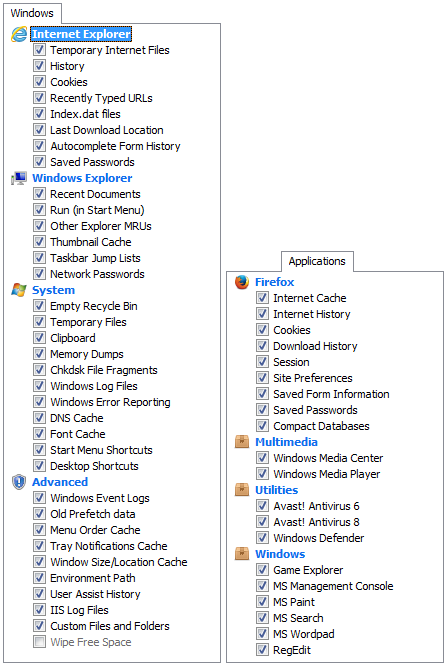
Figure 2: The Windows and Applications tabs with all options checked
Note: By using the following steps, you will delete temporary files for the items you have checked in both the Windows and Applications tabs. Given that different users have different programs installed on their computer, your own list of applications may vary somewhat from the example in Figure 2 above.
Step 3. Scroll down the Windows and Applications tabs and check all the options in the Advanced section too. As you check some of the options, a warning confirmation dialog box appears, explaining what each option will affect:
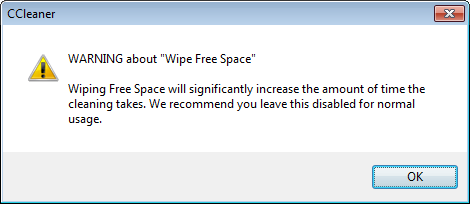
Figure 3: An example of a Warning confirmation dialog box
Warning: By checking the Wipe Free Space option, you will significantly increase the amount of time required for the cleaning process; as such, ensure you have at least an hour or more for this.
Note: Check all the options in the Windows and Applications tabs to enable a full and thorough cleaning of the temporary files. However, it is essential that you understand what kind of configurations and settings are being deleted. Click  to close each message and continue with the temporary file deletion process.
Step 4. Click  to generate and view a list of the different temporary files available for deletion.
Tip: Close all other programs before you begin the cleaning process. If you leave them open, CCleaner may not remove all the temporary files associated with those programs, and you may receive pop-up notices resembling Figure 4 below.
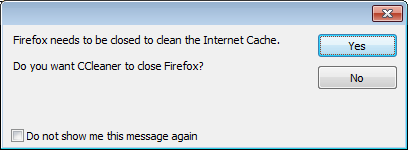
Figure 4: An example of a notice to close Firefox/Mozilla
Step 5. Click to continue listing the files for deletion.
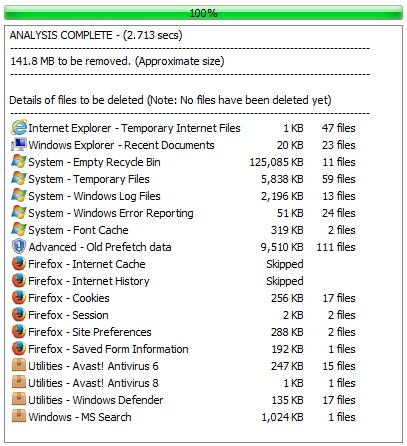
Figure 5: An example of a list of temporary files for deletion
Note: CCleaner only deletes the temporary files generated whenever you use an application – and not the application itself. In Figure 5 for example, the Applications – Office 2003 program suite remains installed on the computer, but its temporary files have been deleted. However, to use CCleaner to uninstall a program, please refer to Advanced Options, FAQ and Review, section 5.1 How to Uninstall Programs Using CCleaner.
Step 6. Click  activate the following screen:
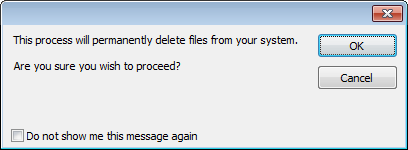
Figure 6: Permanent file deletion confirmation prompt
Step 7. Click to delete these temporary files as follows; after the deletion has been completed, the results displayed may resemble the following screen:
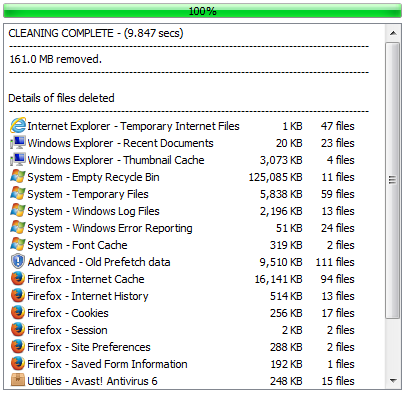
Figure 7: The file deletion results
You have now successfully deleted your temporary files from both the Windows and Applications tabs using CCleaner.
4. Clean the Windows Registry
CCleaner also lets you clean the Windows Registry, a database which stores configuration information, hardware and software settings on your system. Every time you alter system configuration information, install software or perform other routine tasks, these changes are reflected and stored in the Windows Registry.
Over time, however, the Windows Registry accumulates outdated configuration information and settings, including traces of obsolete programs. The CCleaner Registry option lets you scan and remove such information, improving the overall function and speed of your system, as well as protecting your digital privacy and security.
Tip: A scan of the Windows Registry should be performed on a weekly or monthly basis.
4.1 Clean the Windows Registry Using CCleaner
Step 1. Click  to activate the following screen:
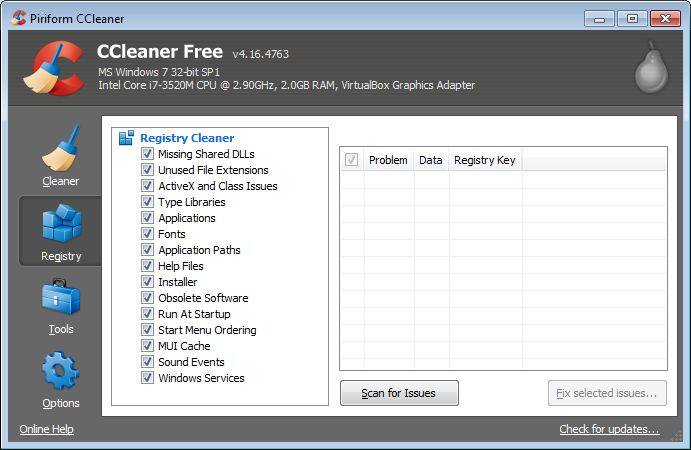
Figure 1: The CCleaner user interface in Registry mode
The CCleaner Registry window is divided into a Registry Cleaner list, and a pane used to display information about any problems identified.
Step 2. Check all the items in the Registry Cleaner list (as shown in Figure 1), and then click  to begin scanning for registry-related problems to be fixed; after some time, your results may resemble the following:
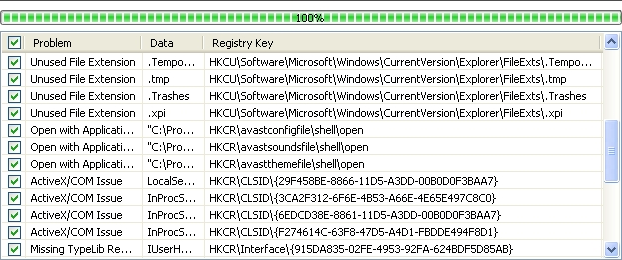
Figure 2: The results pane displaying a list of problems to be fixed
As a precautionary measure before you begin fixing the Windows Registry, you will be prompted to save a backup file of your registry. If a problem occurs after the Windows Registry has been cleaned, you may restore the Windows Registry to its original state using this backup file.
Step 3. Click  to activate the following confirmation dialog box as follows:
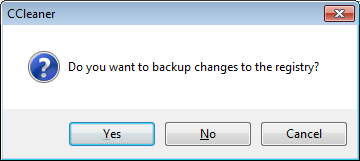
Figure 3: The confirmation dialog box
Tip: If you forget where you have stored your backup registry file, simply perform a search for a .reg file extension.
Step 4. Click  to create a backup of your registry, and activate the following screen:
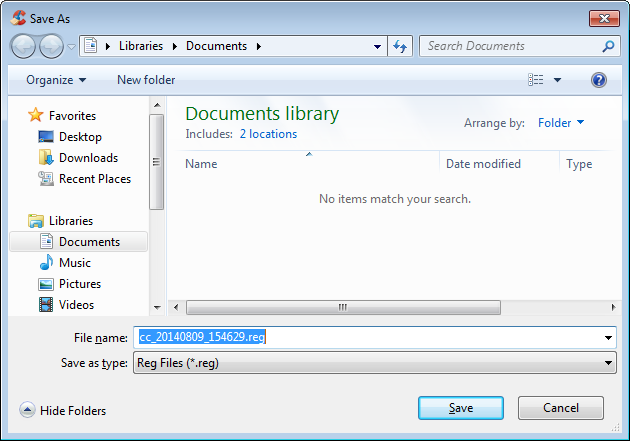
Figure 4: The Save As location browser
Step 5. Click  after you have chosen a location for your backup file, to activate the following dialog box:
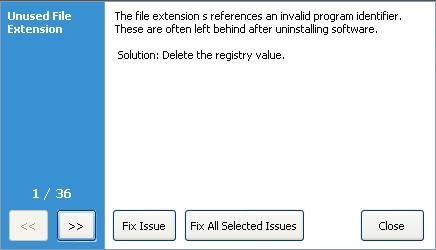
Figure 5: The Fix Issue/Fix All Selected Issues dialog box
Note: Advanced or expert level users will appreciate the ability to fix some problems and ignore others, depending on their requirements. Average users and beginners are recommended to simply fix all the selected issues.
Step 6. Click  or
or  to view each problem, and then click
  to fix only those you would like to.
Step 7. Click  to fix all the selected issues, and then click
  to complete the cleaning process.
Tip: Repeat steps 2 to 7 until you no longer see any problems to be fixed.
The Windows Registry has now been successfully cleaned.
4.2 Recover a Windows Registry Backup File
If you suspect that cleaning the Windows Registry has caused a problem with the functioning of your system, the registry backup file you created in steps 3 to 5 in section 4.1 can be used to restore the original registry and reduce interference with your system.
To restore the original registry, perform the following steps:
Step 1. Select Start > Run to activate the Run window, and then type in regedit as follows:
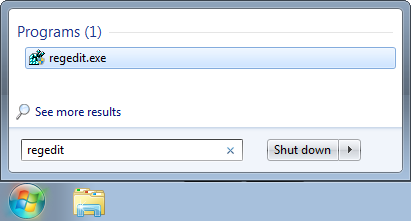
Figure 6: The Run window
Step 2. Click to activate the following screen:
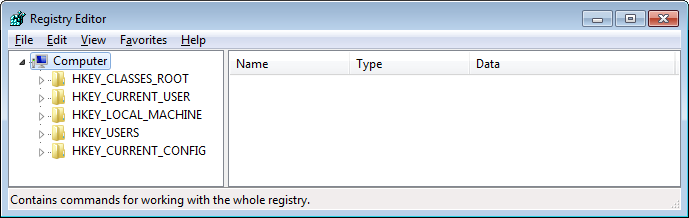
Figure 7: The Registry Editor
Step 3. Select File > Import from the Registry Editor menu bar to activate the Import Registry File screen, and then select  .
.
Step 4. Click  to activate the following confirmation dialog box:
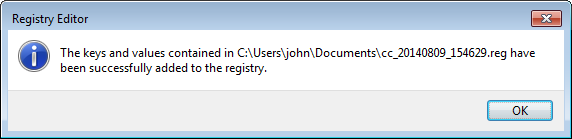
Figure 8: A Registry Editor dialog box confirming the registry backup file has been restored
Step 5. Click to complete the restoration of the registry backup file.
5. Advanced features of CCleaner
CCleaner's Uninstall and Startup features could improve the overall efficiency of your system. They are described below, along with the steps required to permanently delete (or wipe) free space on a specified drive.
5.1 How to Uninstall Programs Using CCleaner
Important: Make sure the program to be deleted or uninstalled is not essential to the proper functioning of your computer system before you begin doing so.
By deleting unused or unwanted previously installed software before running CCleaner, you may also remove their temporary files and folders. This may reduce the number of temporary files and folders to be deleted, as well as the length of time for the cleaning process.
The CCleaner Uninstall feature is the equivalent of the Uninstall a program feature found in Control Panel. The Uninstall feature lists the programs more clearly and quickly.
To begin uninstalling obsolete programs, perform the following steps:
Step 1. Either click or select Start > Programs > CCleaner to activate the Piriform CCleaner console.
Step 2. Click  and then click
  to activate the following screen:
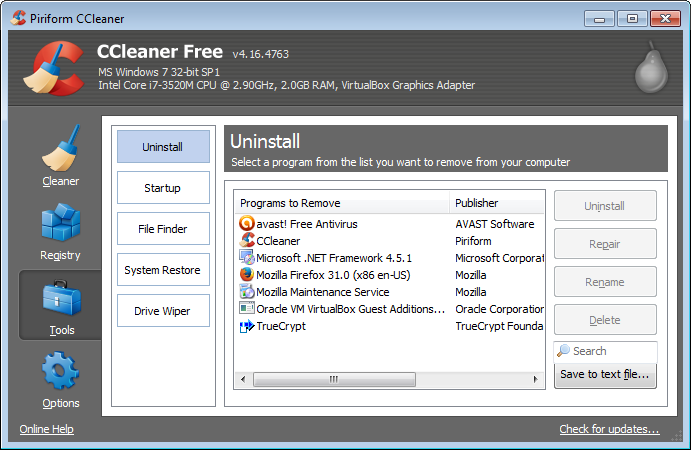
Figure 1: The Tools option displaying the Uninstall pane
Note: The buttons on the right of the Programs to Remove list are only enabled after a program has been selected for removal.
Step 3. Select a program from the Programs to Remove list, and then click  to uninstall the selected program.
Tip: Advanced or experienced users will find the Rename and Delete features useful in keeping the existence of certain software private. Either feature ensures only you know about the existence of this program, keeping it safe from hostile or malicious parties which may list installed programs.
Step 4. Click  to rename that program. Alternatively, click
  to delete a program from that list, but without actually uninstalling it.
5.2 How to Disable Auto-Start Programs in CCleaner
An auto-start program is configured to automatically start itself whenever you turn your computer on. Auto-start programs may start making demands on finite system resources, and slow down your computer at start-up time.
Step 2. Click and then click  to activate the following screen:
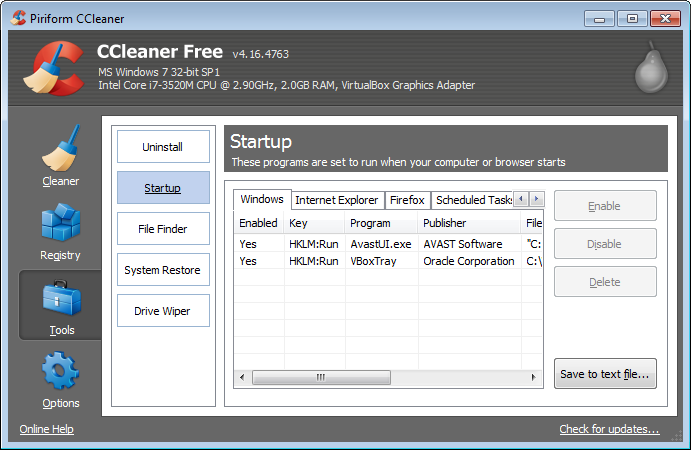
Figure 2: The Tools option displaying the Startup pane
Step 3. Select a program from those listed in the Startup pane and then click  to disable the program so it does not automatically start running when you turn on your computer.
5.3 How to Wipe Free Disk Space Using CCleaner
In the Windows operating system, deleting a file merely removes a reference to that file, but may not remove its actual data. Although the area of that drive will eventually be overwritten with new files over time, a knowledgeable individual could rebuild either all or sections of that file. However, you can prevent this from happening by wiping the free space on your hard disk. CCleaner also lets you wipe the Master File Table.
The Master File Table (MFT) is an index of all file names, their locations, and other information. When Microsoft Windows deletes a file it only marks the index entry for that file as deleted for reasons of efficiency. The MFT entry for the file and the content of the file continue to reside on the hard disk.
Note: Performing a disk and Master File Table wipe consumes a considerable amount of time, and the amount of time required depends on the number of passes set.
To set the drive you would like to wipe, perform the following steps:
Step 1. Click  and then click
  to activate the Drive Wiper pane.
Step 2. Click the Wipe  to activate its drop-down list, and then select either the Free Space or the Entire drive (All data will be erased) item, and then select
  from the Security drop-down list.
Warning: Only select the Entire drive (All data will be erased) item if you are completely certain that you want your documents, files and folders and free space erased.
Step 3. Click the check box associated with the drive to be erased, and enable the  ; your window should now resemble the following:
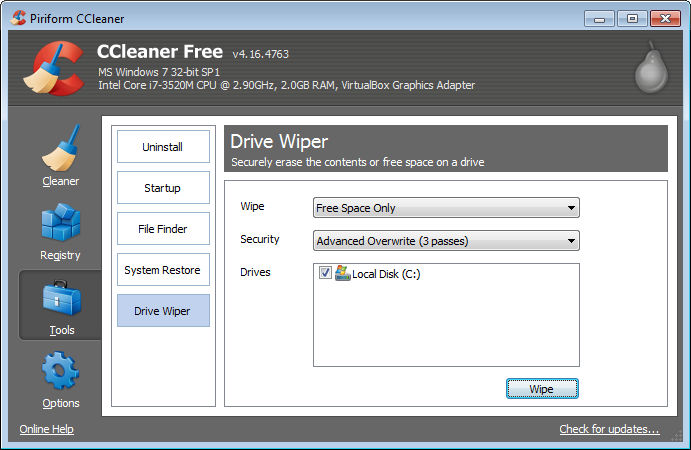
Figure 3: The Drive Wiper pane with the relevant options enabled
Step 4. Click to begin wiping your selected drive(s).
6. Portable CCleaner
6.1 Differences between the Installed and Portable versions of CCleaner
Given that portable tools are not installed on a local computer, their existence and use may remain undetected. However, keep in mind that your external device or USB memory stick, and portable tools are only as safe as the computer you are using, and may risk being exposed to adware, malware, spyware and viruses.
There are no other differences between Portable CCleaner, and this version can be installed on a local computer as well.
6.2 How to Download and Extract Portable CCleaner
To begin downloading and extracting Portable CCleaner, perform the following steps:
Step 1. Click http://www.piriform.com/ccleaner/download/portable to go to the appropriate Portable CCleaner download site, and begin automatically downloading Portable CCleaner.
Step 2. Navigate to the designated download folder, and then right click  to activate the Windows pop-up menu; select the Extract All... item as shown in Figure 1 below:

Figure 1: The Windows pop-up menu with the Extract All... item selected
Note: Step 2 will automatically activate the Extract Compressed (Zipped) Folders window:
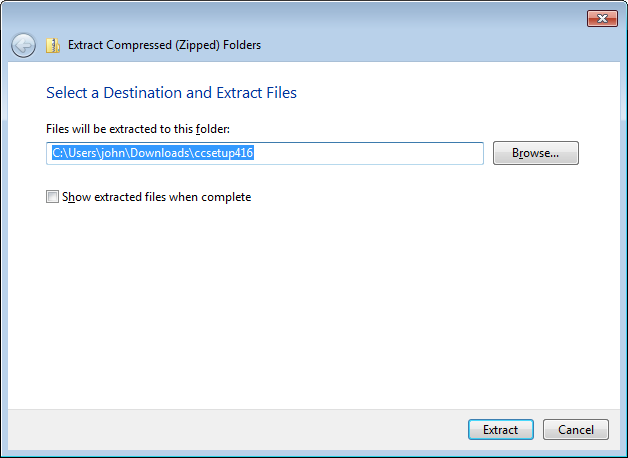
Figure 2: The Select a Destination window
Step 3. Click  to activate the Select a Destination navigation window; navigate to an external device or USB memory stick, and then click
  to create the new Portable CCleaner folder in which to extract the installation file.
Step 4. Type in a name for the new folder in the document tree as shown in Figure 3 below:
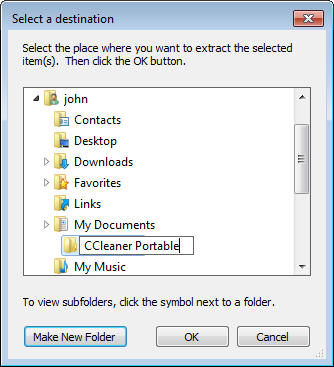
Figure 3: The Select a Destination navigation window (resized)
Note: Choose a different name for the Portable CCleaner folder, so it may appear less obvious that you are using it.
Step 5. Click  to close the Select a Destination navigation window and return to the Select a Destination window, then click
  to begin extracting its contents to the newly created folder.
Step 6. Click  to automatically verify that Portable CCleaner has been successfully extracted to the destination folder, as shown in Figure 4 below:
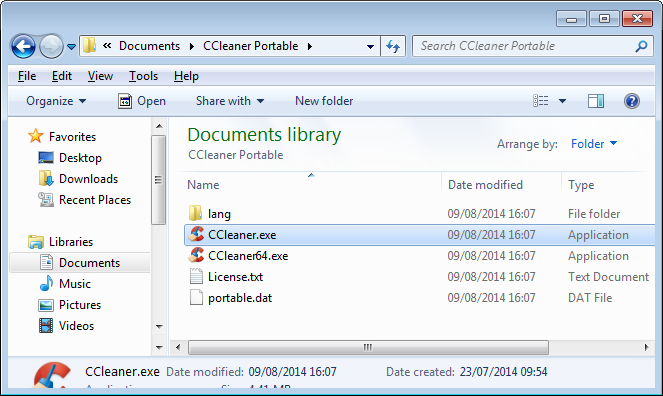
Figure 4: The CCleaner program extracted to the destination folder on a designated external hard drive (resized)
Step 7. Double click  to launch Portable CCleaner.
Please refer to the CCleaner chapter to begin configuring and using it.
FAQ
Q: If I uninstall CCleaner, will material deleted previously remain that way?
A: Yes. If you have configured and run CCleaner *properly, deleted files will stay deleted - permanently.
Q: If I copy CCleaner to a USB memory stick, can I use it on a computer in an Internet café to erase traces of my work there? Is there any reason I cannot use it this way?
A: Yes! There is a portable version of CCleaner. If the Internet café you are working at lets you run programs from a USB memory stick, then yes, you can use the portable version of CCleaner to erase traces of your having worked there. However, do keep in mind that you could be monitored at the Internet café. Also, you may run the risk of infection by connecting your USB memory stick to the computer at the Internet café.
Q: If I only use one pass of CCleaner, will it be possible for somebody to recover my data? What about if I use 7 passes?
A: The more passes used for wiping data, the less chance anyone has of recovering that data. However, increasing the number of passes used in wiping data also increases the length of the wiping process.
Q: Is cleaning the Windows Registry sufficient for removing all obvious signs of my having temporarily installed and used certain programs on my computer?
A: Ideally, you should delete all the files related to this program, use CCleaner to delete temporary files, clean the Windows Registry and wipe a free space on the disk to remove all traces of software and the tasks you performed with it.